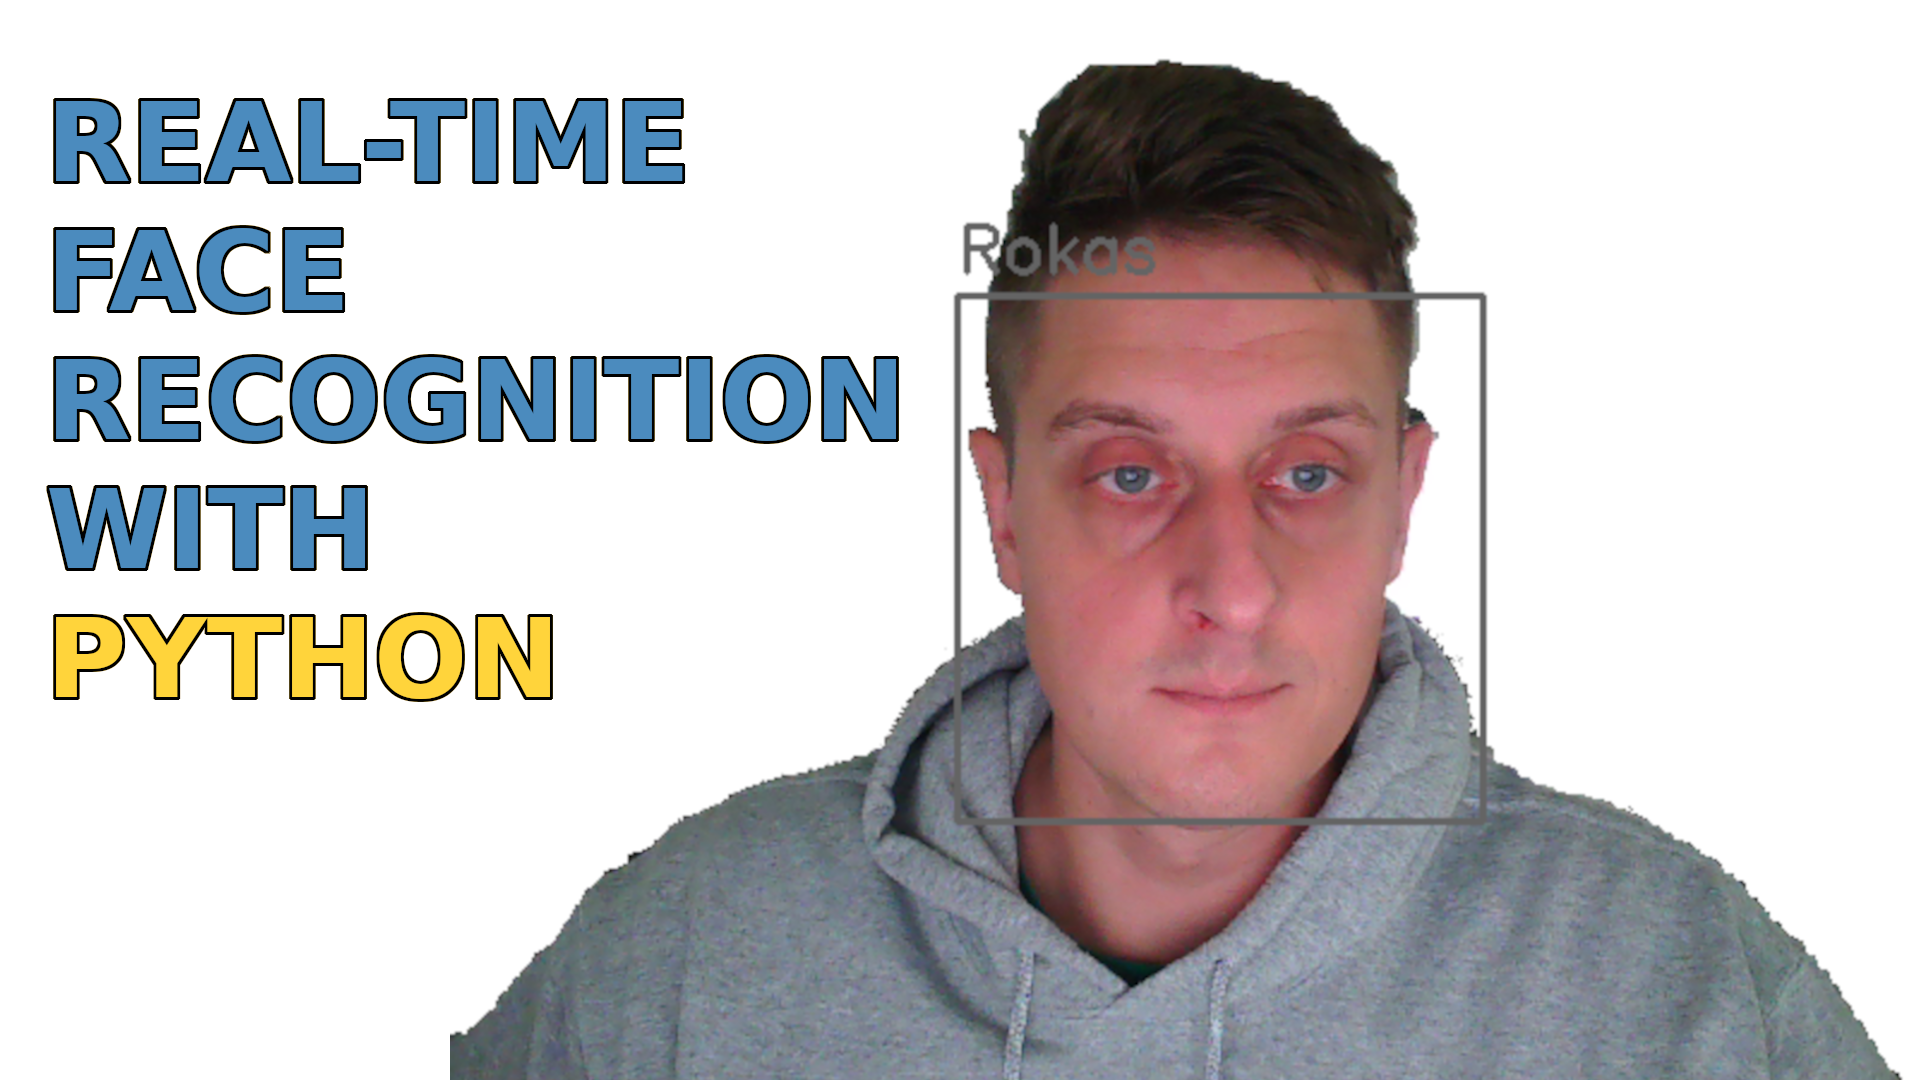
In this article, I'll introduce a simple way to build and use any custom face recognition model with my custom framework. After completing this tutorial, you will learn how to use pre-trained models to create a real-time face recognition system with any CPU.
Officially, Face Recognition is defined as the problem of verifying or identifying faces in an image. But usually, there is a question, how exactly do we recognize a human face in an image?
The face recognition process can be separated into multiple steps. In the image below, there is an example of the face recognition pipeline:

The Face recognition pipeline steps:
- Face detection - Detect one or more faces in an image;
- Feature extraction - Extracting the essential features from the faces detected in the picture;
- Face matching - Match faces to anchor face features.
There are many ways to implement each step in a face recognition pipeline. In this article, we will focus on a popular deep learning technique for face detection using the MediaPipe face detection model covered in the first tutorial, feature extraction using FaceNet, and face matching with cosine or euclidean distance.
Let's tackle this task one step at a time. In each step, we will learn about different machine-learning algorithms. I'm not going to explain each algorithm fully so it won't become an endless article. Still, I'll show you the main ideas behind each one. You'll learn to build your facial recognition system in Python using the MediaPipe face detector and FaceNet face feature extractor.
Face detection with MediaPipe:
The first step in our face recognition pipeline is face detection. We need to localize the faces in the image before we can try to tell them apart! Even though I covered the MediaPipe face detector in detail in my previous tutorial, we still need to mention it. If you used any cameras in the last decade, you probably noticed an evolution of face detection in action.
Face detection is a great feature used for most cameras nowadays. For example, when the camera can automatically localize faces, it can ensure that all the faces are focused before it takes the picture. But now we'll use it for a different purpose - finding the areas of the face that we'll pass to another step in our pipeline, "Face Feature Extractor".
This post will use my favorite, the ultra-light MedaPipe detector. But suppose you are interested in applying any of the other detection methods mentioned. In that case, you can refer to my previous tutorial, where I demonstrated how you could easily create your Object to run on my Engine. I have explored multiple face detectors. These include MTCNN, Dlib, MediaPipe, pure CNN, and a few other face detectors released recently.
But let's continue what we do with located faces.
FaceNet face feature extraction:
FaceNet, similar to other facial recognition models, is a deep neural network to extract a human facial image's features. It was published by Google researchers Schroff et al. in 2015.
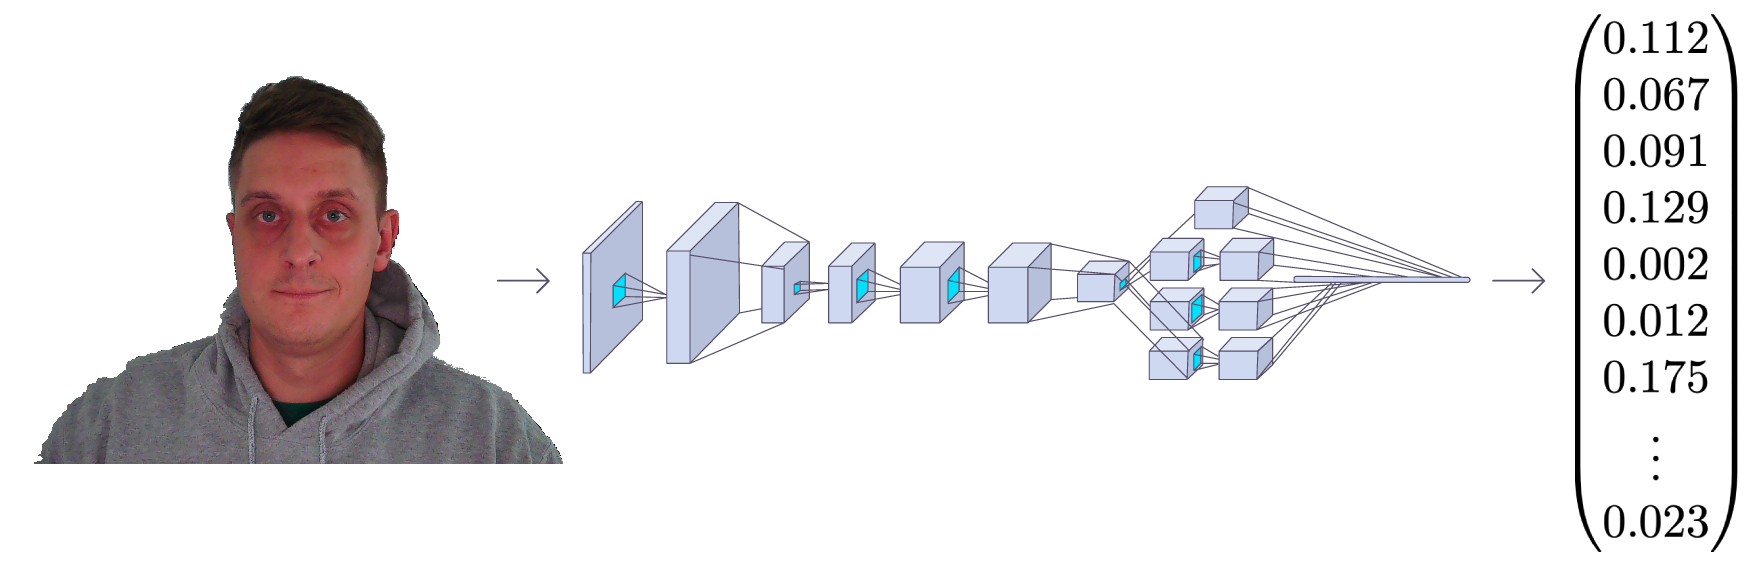
The FaceNet takes an image of a human face as input, and the output is a vector of 128 numbers representing the essential features of the face. This vector is called embedding because all relevant information from the face image is embedded in this vector. Basically, FaceNet takes a human face and compresses it into a 128-number vector. But if we look at this vector, it would be impossible for us humans to tell what that person's face is like.
Associating high dimensional data (such as images) with low dimensional images (vector embeddings) in machine learning has become a fairly common practice these days.
One common way to identify a person in an unseen image would be to get their embedding and calculate the distances to pictures of known people. We usually calculate the distance using the Cosine or Euclidean distance math formulas. If the calculated face distance is close enough to the embeddings of person A, we assume that this face is of the same person.
It sounds easy, right? We feed the image through FaceNet, get a magic vector number, and check that the calculated distance is sufficiently close to any known faces we have. Still, there is a question, how does FaceNet know what to extract from a face image? And what do these numbers in the embedding vector even mean? This is not the purpose of this tutorial, but we can cover it briefly so that we are familiar with it.
To train a face recognizer, we need many images of faces. Like every machine learning problem, training typically requires several thousand different images. When we start the training process, the model generates random vectors for each image, which means that the images are randomly distributed. But here are the learning steps:
- Randomly selects an anchor image;
- Randomly selects a positive sample image of the same person as the base image;
- Randomly selects a negative sample image of a person that is different from the main image;
- Adjusts the FaceNet neural network parameters so that the positive sample is closer to the anchor than the negative sample.
We repeat these four steps until there are no more changes to be done or these changes are so tiny that there is no impact. When the training is completed, all the faces of the same person are close to each other and far away from different ones in terms of distance.
You may ask, what do the numbers in the embedding vector mean? In fact, we don't know what these numbers represent, and it's tough to interpret them. We know that these features seem essential for face recognition, and it works.
If you are a developer, you can think of face matcher as a hash function. It maps the faces of the same person to (approximately) the same place in the coordinate system where embedding is the hashcode.
But it's enough of this theory. Let's go to our code stuff. As before, I wrote the entire Object specifically for face recognition, which we'll use together with an engine object. This Object has everything it needs to do, from running inference, loading anchor images, measuring distance, drawing Recognition on a frame, and a little more; you can always add the functionality you need. Here is the complete faceNet.py object code:
# faceNet.py
import cv2import cv2
import stow
import typing
import numpy as np
import onnxruntime as ort

class FaceNet:
    """FaceNet class object, which can be used for simplified face recognition
    """
    def __init__(
        self,
        detector: object,
        onnx_model_path: str = "models/faceNet.onnx",
        anchors: typing.Union[str, dict] = 'faces',
        force_cpu: bool = False,
        threshold: float = 0.5,
        color: tuple = (255, 255, 255),
        thickness: int = 2,
        ) -> None:
        """Object for face recognition
        Params:
            detector: (object) - detector object to detect faces in image
            onnx_model_path: (str) - path to onnx model
            force_cpu: (bool) - if True, onnx model will be run on CPU
            anchors: (str or dict) - path to directory with faces or dictionary with anchor names as keys and anchor encodings as values
            threshold: (float) - threshold for face recognition
            color: (tuple) - color of bounding box and text
            thickness: (int) - thickness of bounding box and text
        """
        if not stow.exists(onnx_model_path):
            raise Exception(f"Model doesn't exists in {onnx_model_path}")

        self.detector = detector
        self.threshold = threshold
        self.color = color
        self.thickness = thickness

        providers = ['CUDAExecutionProvider', 'CPUExecutionProvider']

        providers = providers if ort.get_device() == "GPU" and not force_cpu else providers[::-1]

        self.ort_sess = ort.InferenceSession(onnx_model_path, providers=providers)

        self.input_shape = self.ort_sess._inputs_meta[0].shape[1:3]

        self.anchors = self.load_anchors(anchors) if isinstance(anchors, str) else anchors

    def normalize(self, img: np.ndarray) -> np.ndarray:
        """Normalize image

        Args:
            img: (np.ndarray) - image to be normalized

        Returns:
            img: (np.ndarray) - normalized image
        """
        mean, std = img.mean(), img.std()
        return (img - mean) / std

    def l2_normalize(self, x: np.ndarray, axis: int = -1, epsilon: float = 1e-10) -> np.ndarray:
        """l2 normalization function

        Args:
            x: (np.ndarray) - input array
            axis: (int) - axis to normalize
            epsilon: (float) - epsilon to avoid division by zero

        Returns:
            x: (np.ndarray) - normalized array
        """
        output = x / np.sqrt(np.maximum(np.sum(np.square(x), axis=axis, keepdims=True), epsilon))
        return output

    def detect_save_faces(self, image: np.ndarray, output_dir: str = "faces"):
        """Detect faces in given image and save them to output_dir

        Args:
            image: (np.ndarray) - image to be processed
            output_dir: (str) - directory where faces will be saved

        Returns:
            bool: (bool) - True if faces were detected and saved
        """
        face_crops = [image[t:b, l:r] for t, l, b, r in self.detector(image, return_tlbr=True)]

        if face_crops == []:
            return False

        stow.mkdir(output_dir)

        for index, crop in enumerate(face_crops):
            output_path = stow.join(output_dir, f"face_{str(index)}.png")
            cv2.imwrite(output_path, crop)
            print("Crop saved to:", output_path)

        self.anchors = self.load_anchors(output_dir)

        return True

    def load_anchors(self, faces_path: str):
        """Generate anchors for given faces path

        Args:
            faces_path: (str) - path to directory with faces

        Returns:
            anchors: (dict) - dictionary with anchor names as keys and anchor encodings as values
        """
        anchors = {}
        if not stow.exists(faces_path):
            return {}

        for face_path in stow.ls(faces_path):
            anchors[stow.basename(face_path)] = self.encode(cv2.imread(face_path.path))

        return anchors

    def encode(self, face_image: np.ndarray) -> np.ndarray:
        """Encode face image with FaceNet model

        Args
            face_image: (np.ndarray) - face image to be encoded

        Returns:
            face_encoding: (np.ndarray) - face encoding
        """
        face = self.normalize(face_image)
        face = cv2.resize(face, self.input_shape).astype(np.float32)

        encode = self.ort_sess.run(None, {self.ort_sess._inputs_meta[0].name: np.expand_dims(face, axis=0)})[0][0]
        normalized_encode = self.l2_normalize(encode)

        return normalized_encode

    def cosine_distance(self, a: np.ndarray, b: typing.Union[np.ndarray, list]) -> np.ndarray:
        """Cosine distance between wectors a and b

        Args:
            a: (np.ndarray) - first vector
            b: (np.ndarray) - second list of vectors

        Returns:
            distance: (float) - cosine distance
        """
        if isinstance(a, list):
            a = np.array(a)

        if isinstance(b, list):
            b = np.array(b)

        return np.dot(a, b.T) / (np.linalg.norm(a) * np.linalg.norm(b))

    def draw(self, image: np.ndarray, face_crops: dict):
        """Draw face crops on image

        Args:
            image: (np.ndarray) - image to be drawn on
            face_crops: (dict) - dictionary with face crops as values and face names as keys

        Returns:
            image: (np.ndarray) - image with drawn face crops
        """
        for value in face_crops.values():
            t, l, b, r = value["tlbr"]
            cv2.rectangle(image, (l, t), (r, b), self.color, self.thickness)
            cv2.putText(image, stow.name(value['name']), (l, t - 10), cv2.FONT_HERSHEY_SIMPLEX, 0.9, self.color, self.thickness)

        return image

    def __call__(self, frame: np.ndarray) -> np.ndarray:
        """Face recognition pipeline

        Args:
            frame: (np.ndarray) - image to be processed

        Returns:
            frame: (np.ndarray) - image with drawn face recognition results
        """
        face_crops = {index: {"name": "Unknown", "tlbr": tlbr} for index, tlbr in enumerate(self.detector(frame, return_tlbr=True))}
        for key, value in face_crops.items():
            t, l, b, r = value["tlbr"]
            face_encoding = self.encode(frame[t:b, l:r])
            distances = self.cosine_distance(face_encoding, list(self.anchors.values()))
            if np.max(distances) > self.threshold:
                face_crops[key]["name"] = list(self.anchors.keys())[np.argmax(distances)]

        frame = self.draw(frame, face_crops)

        return frame
I am not going step by step with this Object; I am covering this in my YouTube video tutorial. But I must mention that here we are loading the .onnx model, which we can convert with faceNet/convert_to_onnx.py script:
# faceNet/convert_to_onnx.py
import os
import tensorflow as tf
import tf2onnx
from architecture import InceptionResNetV2

if __name__ == '__main__':
    """ weights can be downloaded from https://drive.google.com/drive/folders/1scGoVCQp-cNwKTKOUqevCP1N2LlyXU3l?usp=sharing
    Put facenet_keras_weights.h5 file in model folder
    """
    facenet_weights_path = "models/facenet_keras_weights.h5"
    onnx_model_output_path = "models/faceNet.onnx"

    if not os.path.exists(facenet_weights_path):
        raise Exception(f"Model doesn't exists in {facenet_weights_path}, download weights from \
            https://drive.google.com/drive/folders/1scGoVCQp-cNwKTKOUqevCP1N2LlyXU3l?usp=sharing")

    faceNet = InceptionResNetV2()
    faceNet.load_weights(facenet_weights_path)

    spec = (tf.TensorSpec(faceNet.inputs[0].shape, tf.float32, name="image_input"),)
    tf2onnx.convert.from_keras(faceNet, output_path=onnx_model_output_path, input_signature=spec)
First, you must download weights from the given link in a code and place them in the models folder. Then run the following code with python faceNet/convert_to_onnx.py, which should convert the model to .onnx format.
It's as simple as that. When we have our model, we can open the main.py script and use the following code to run webcam real-time face recognition:
# main.py
from utils import FPSmetric
from engine import Engine
from faceDetection import MPFaceDetection
from faceNet.faceNet import FaceNet

if __name__ == '__main__':
    facenet = FaceNet(
        detector = MPFaceDetection(),
        onnx_model_path = "models/faceNet.onnx",
        anchors = "faces",
        force_cpu = True,
    )
    engine = Engine(webcam_id=0, show=True, custom_objects=[facenet, FPSmetric()])

    # save first face crop as anchor, otherwise don't use
    while not facenet.detect_save_faces(engine.process_webcam(return_frame=True), output_dir="faces"):
        continue

    engine.run()
As I mentioned, to extract face embeddings, first, while defining the FaceNet Object, we need to localize the face on a frame. For this, we are using my MPFaceDetection object; more details you can find in my second tutorial about that. We then tell the model the path of our saved .onnx model. Then we give it the path where the anchors are saved; it must be images with face crop. For example, I have mine on the image "Rokas.png" where my cropped face is. This means that model will load this anchor and going to display my name if it finds a match with it.
Ok, nice. Next, we need to create an engine object that will be responsible for processing images, video, or webcam stream; I am choosing to process a webcam. With the "show" argument, I am telling the Object to display this frame for me on a screen. Also, I am adding an FPSmetric to know how fast face recognition works. Finally, I must pass my "facenet" object to the "custom_objects" argument. Either here, we can add even more, the "pencil sketch", "background removal" or other entities we want.
Now, if we don't have the crop saved on a disc, I created a function to grab a first webcam frame, and if It finds a face in it, it crops and saves it:
while not facenet.detect_save_faces(engine.process_webcam(return_frame=True), output_dir="faces"):
    continue
After saving the anchor face, it moves to the "engine.run()" function, which processed each frame, and we should see similar results to my following image:
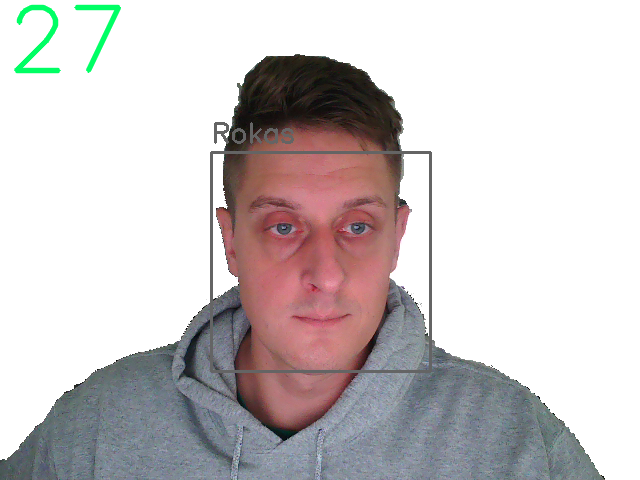
We clearly can see FPS at the left top corner and a square on my face with the name of the anchor image. That's amazing!
Conclusion:
Finally, we have created a system that can perform real-time face recognition on our CPU, which runs at around 30 fps, which is enough for us!
I found this tutorial to be fascinating with the results I was able to achieve. We could further work on this project by placing it on raspberry pi for real-time face recognition to unlock some entrances for us. Or we can put it at our house entrance to know whether someone unfamiliar is on our door. There are many possible ways to use it!
Thanks for reading! As always, all the code given in this tutorial can be found on my GitHub page and is free to use!