This tutorial will be different from the previous two tutorials. So the main idea why I am doing this is that I was applying for a job some time ago and received a task to do. So here are the requirements for a task: You have two similar photos, JPEG(RGB) and TIFF(Grayscale), or a pack of photos in two different folders. What you need to do:
• Find overlapping regions between these two photos and crop RGB photos up to the overlapping regions.
• Save TIFF photo to 4th RGB image channel.
• Calculate stitching duration.
• Use multiprocessing to faster things up.
• Use script from CMD line.
• Save stitched images somewhere.
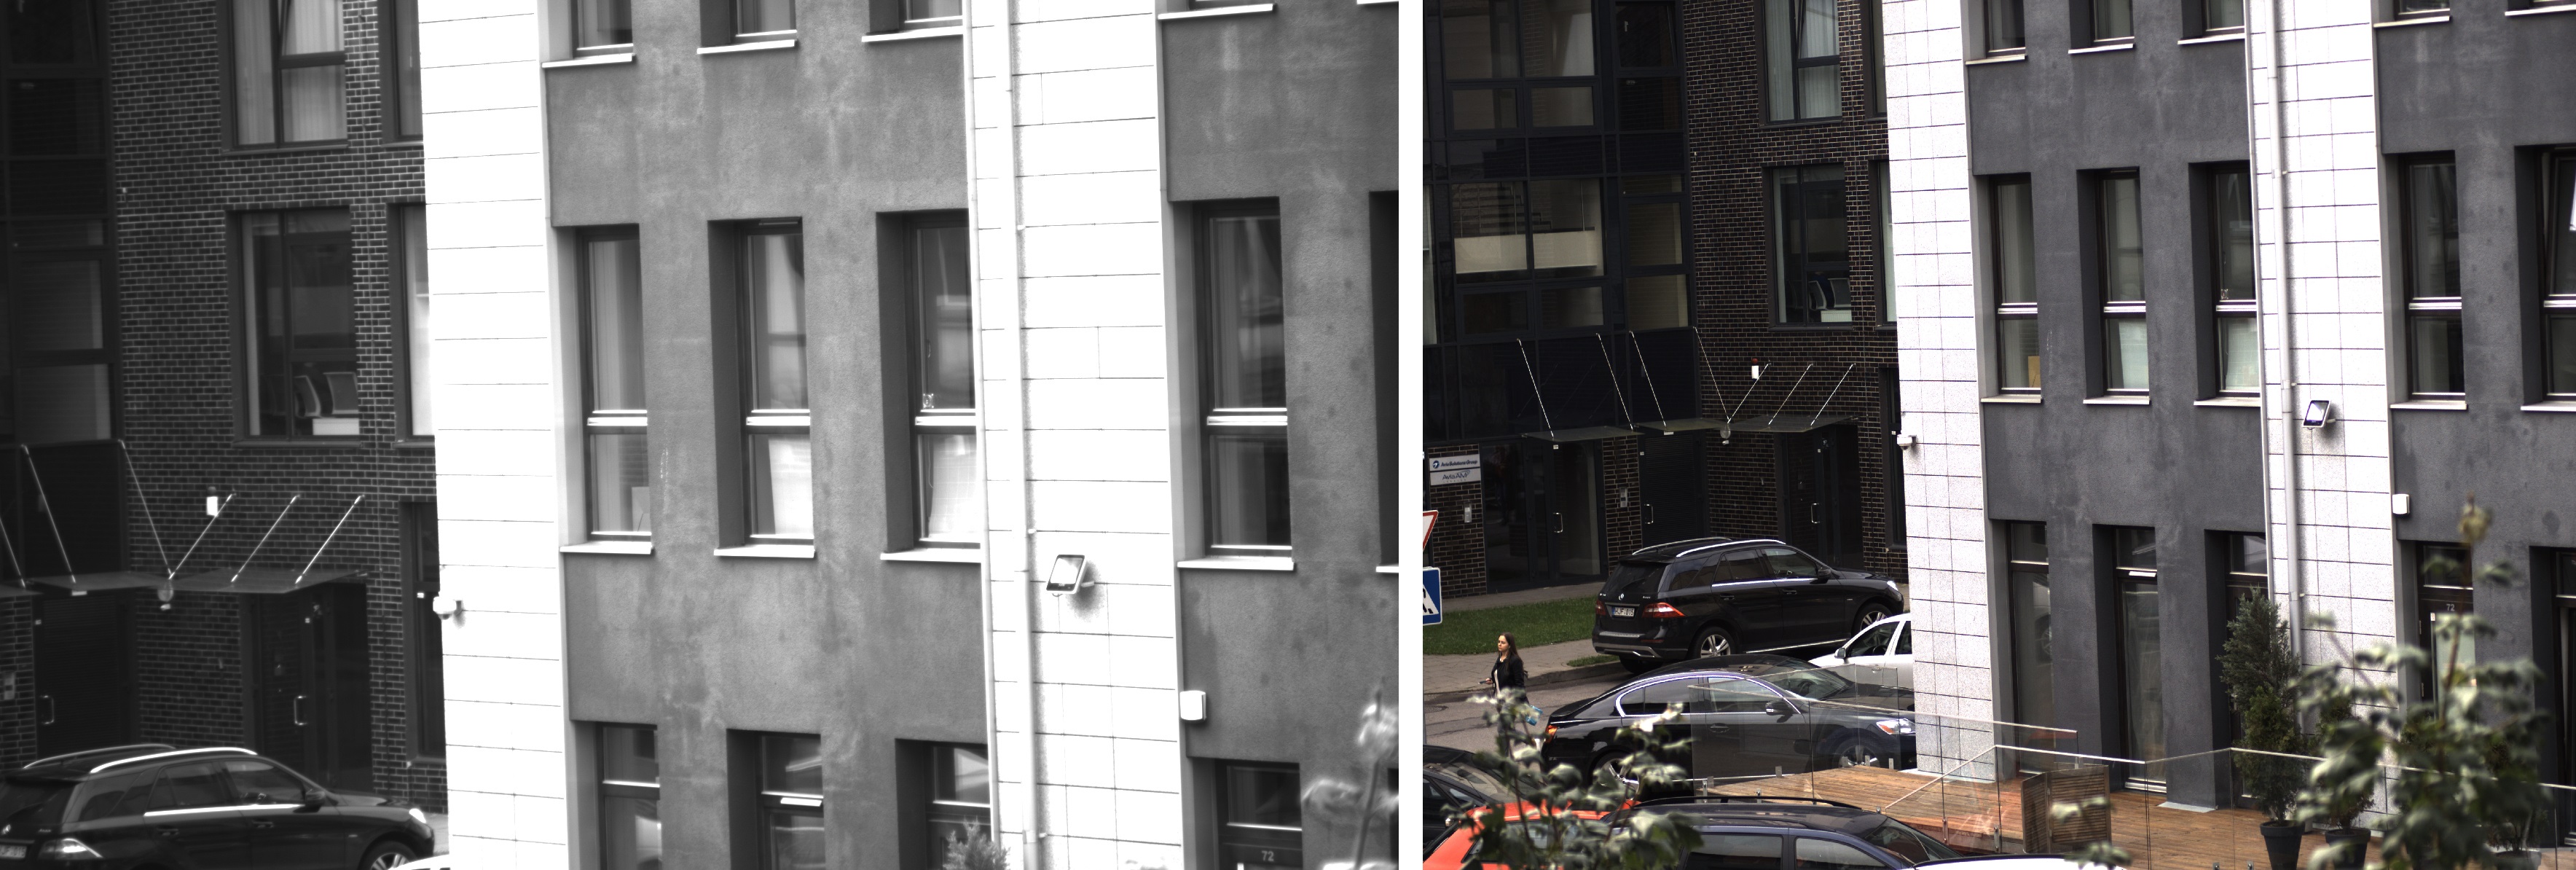
I have two folders of images for this job, but in this tutorial part, I will use only two images below. In our next tutorial, I will give you a link to download all these images to test the code by yourself. So here are two images:
if __name__ == "__main__": a new function, which always starts when we run our script and call our MainFunction from there with image names. At the same time, I measured time duration before doing image-stitching, and after, I calculated how long it took.You can download images from these links: RGB and NIR.
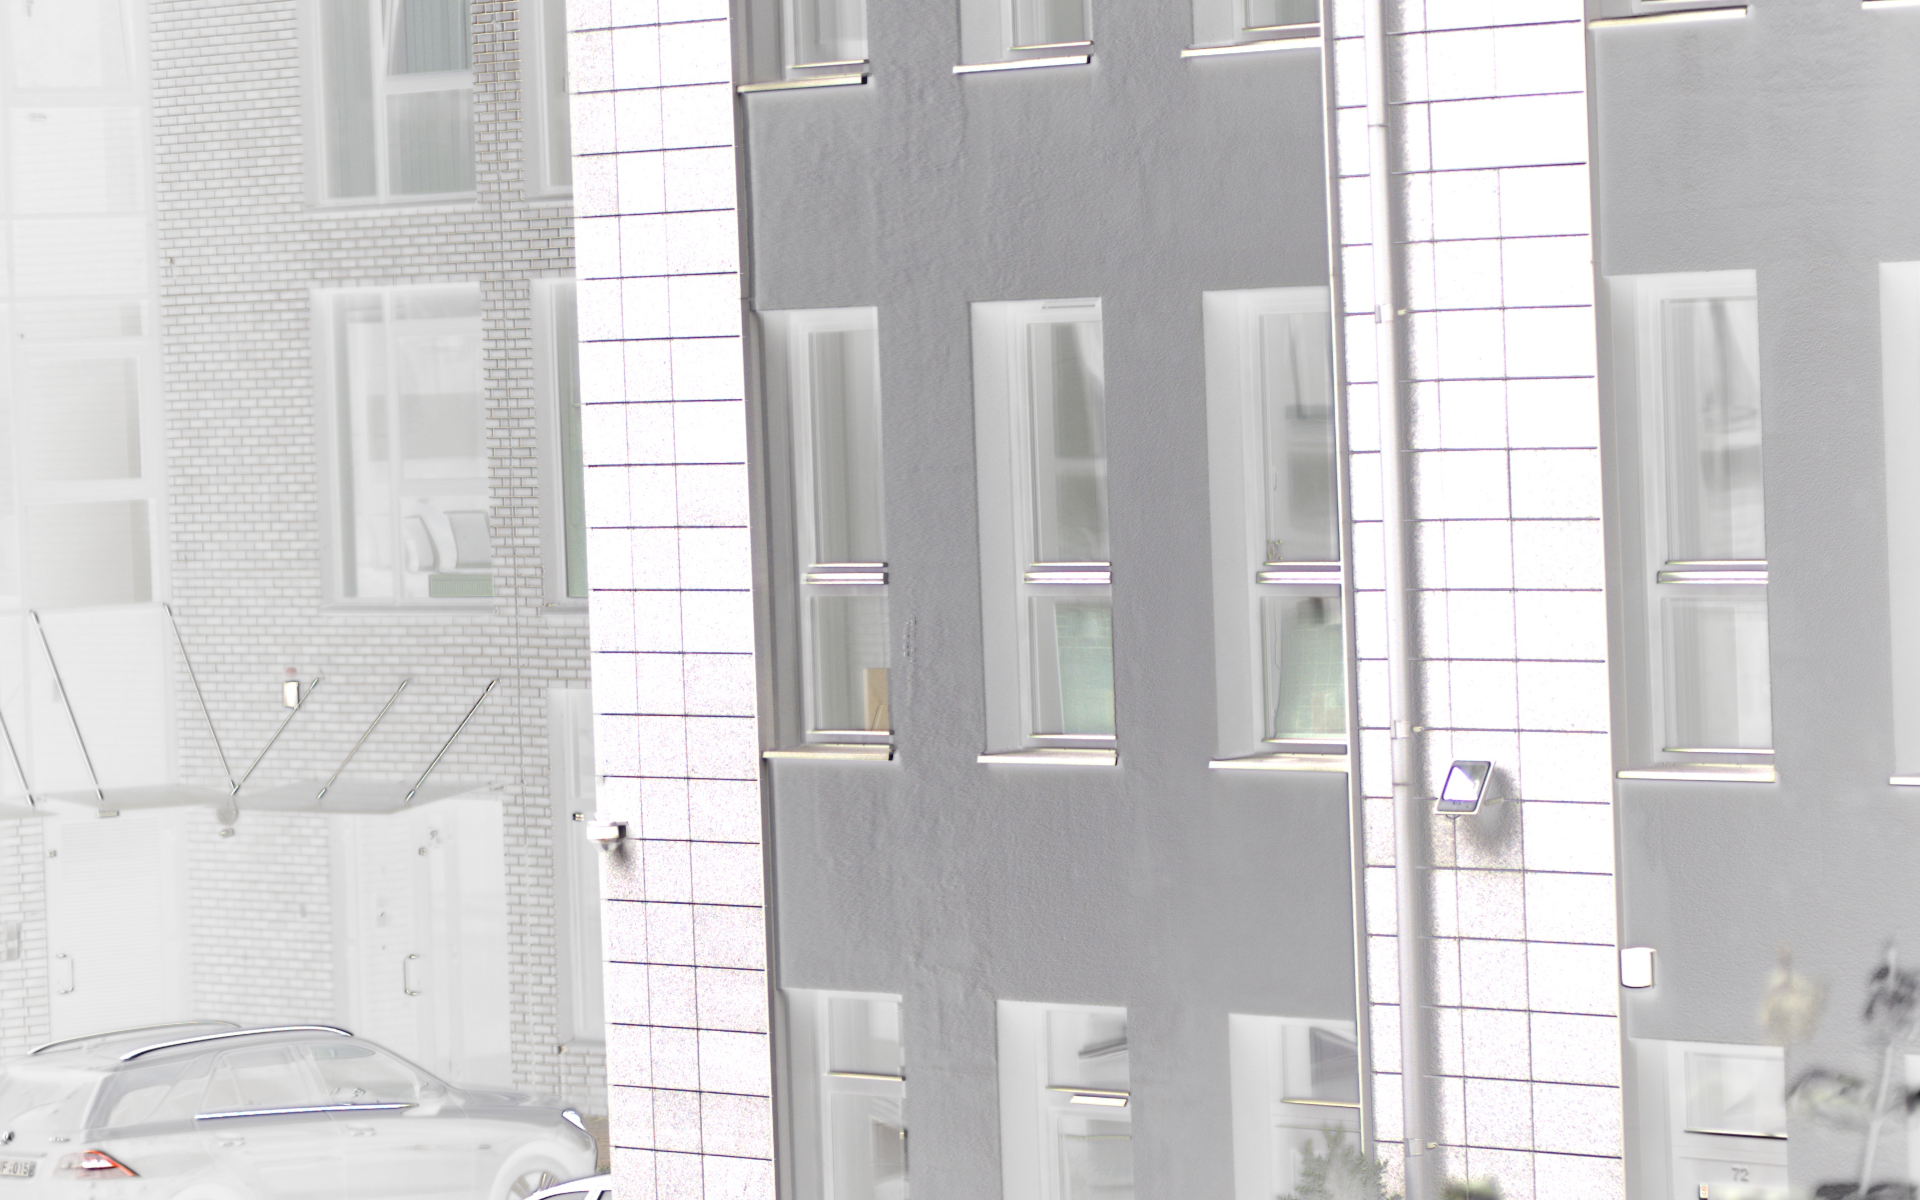
Our stitched image result:
Here is the full tutorial code:
import cv2
import numpy as np
import time

resizer = 1
def MainFunction(JPEGimage, TIFFimage, number=''):
    img_ = cv2.imread(JPEGimage)
    img_ = cv2.resize(img_, (0,0), fx=resizer, fy=resizer)
    img1 = cv2.cvtColor(img_,cv2.COLOR_BGR2GRAY)

    img = cv2.imread(TIFFimage)
    img = cv2.resize(img, (0,0), fx=resizer, fy=resizer)
    img2 = cv2.cvtColor(img,cv2.COLOR_BGR2GRAY)

    sift = cv2.xfeatures2d.SIFT_create()
    # find the key points and descriptors with SIFT
    kp1, des1 = sift.detectAndCompute(img1,None)
    kp2, des2 = sift.detectAndCompute(img2,None)
    #cv2.imshow('original_image_left_keypoints',cv2.drawKeypoints(img_,kp1,None))

    match = cv2.BFMatcher()
    matches = match.knnMatch(des1,des2,k=2)

    good = []
    for m,n in matches:
        if m.distance < 0.5*n.distance:
            good.append(m)

    if len(good) > 10:
        src_pts = np.float32([ kp1[m.queryIdx].pt for m in good ]).reshape(-1,1,2)
        dst_pts = np.float32([ kp2[m.trainIdx].pt for m in good ]).reshape(-1,1,2)

        M, mask = cv2.findHomography(src_pts, dst_pts, cv2.RANSAC, 5.0)

    '''
    draw_params = dict(matchColor = (0,255,0), # draw matches in green color
                       singlePointColor = None,
                       flags = 2)

    img3 = cv2.drawMatches(img_,kp1,img,kp2,good,None,**draw_params)
    cv2.imshow("original_image_drawMatches.jpg", img3)
    '''
    warped_image = cv2.warpPerspective(img_,M,(img.shape[1], img.shape[0]))

    RGBA_image = cv2.cvtColor(warped_image, cv2.COLOR_RGB2RGBA)
    RGBA_image[:,:,3] = img2
    cv2.imwrite("_"+str(number)+".png",RGBA_image)


if __name__ == "__main__":
    start_time = time.time()

    MainFunction('RGB.jpeg', 'NIR.tiff')

    print("Time took:", time.time() - start_time)
    print("Finished")
Conclusion:
In this short tutorial, I wasn't explaining everything in detail while writing the tutorial. So what is left for us to do is write a code, stitch single images and images from folders, do everything in multiprocessing, and start the process from the cmd line. If you want more details, check my two previous tutorials and my video tutorials.