
We ran actual pre-trained object detection in the previous tutorial, but our code is messy, and detection is working really slow. In this part, we will clean the messy code and make some code modifications that our object detection would work faster.
At first, I went through all code and deleted all unnecessary code, so instead of using object_detection_tutorial_grabscreen.py, better take object_detection_tutorial_grabscreen_pretty.py it will be much easier to understand how it works.
After cleaning the code, I started to make some changes to it. I mainly deleted def run_inference_for_single_image(image, graph): function and added needed lines to the main while loop and this changed object detection speed. Not taking into detail here is the code, you can copy and test (you can find it on the GitHub page):
# Welcome to the object detection tutorial!

# # Imports
os.environ['CUDA_VISIBLE_DEVICES'] = '-1'

# title of our window
title = "FPS benchmark"
# set start time to current time
start_time = time.time()
# displays the frame rate every 2 second
display_time = 2
# Set primarry FPS to 0
fps = 0
# Load mss library as sct
sct = mss.mss()
# Set monitor size to capture to MSS
monitor = {"top": 40, "left": 0, "width": 800, "height": 640}

# ## Env setup

# # Model preparation
PATH_TO_FROZEN_GRAPH = 'frozen_inference_graph.pb'
# List of the strings that is used to add correct label for each box.
PATH_TO_LABELS = 'mscoco_label_map.pbtxt'
NUM_CLASSES = 80

# ## Load a (frozen) Tensorflow model into memory.
label_map = label_map_util.load_labelmap(PATH_TO_LABELS)
categories = label_map_util.convert_label_map_to_categories(
    label_map, max_num_classes=NUM_CLASSES, use_display_name=True)
category_index = label_map_util.create_category_index(categories)

detection_graph = tf.Graph()
with detection_graph.as_default():
    od_graph_def = tf.GraphDef()
    with tf.gfile.GFile(PATH_TO_FROZEN_GRAPH, 'rb') as fid:
        serialized_graph = fid.read()
        od_graph_def.ParseFromString(serialized_graph)
        tf.import_graph_def(od_graph_def, name='')

# # Detection
with detection_graph.as_default():
    with tf.Session(graph=detection_graph) as sess:
        while True:
            # Get raw pixels from the screen, save it to a Numpy array
            image_np = np.array(sct.grab(monitor))
            # To get real color we do this:
            image_np = cv2.cvtColor(image_np, cv2.COLOR_BGR2RGB)
            # Expand dimensions since the model expects images to have shape: [1, None, None, 3]
            image_np_expanded = np.expand_dims(image_np, axis=0)
            # Actual detection.
            image_tensor = detection_graph.get_tensor_by_name('image_tensor:0')
            boxes = detection_graph.get_tensor_by_name('detection_boxes:0')
            scores = detection_graph.get_tensor_by_name('detection_scores:0')
            classes = detection_graph.get_tensor_by_name('detection_classes:0')
            num_detections = detection_graph.get_tensor_by_name(
                'num_detections:0')
            # Visualization of the results of a detection.
            (boxes, scores, classes, num_detections) = sess.run(
                [boxes, scores, classes, num_detections],
                feed_dict={image_tensor: image_np_expanded})
            vis_util.visualize_boxes_and_labels_on_image_array(
                image_np,
                np.squeeze(boxes),
                np.squeeze(classes).astype(np.int32),
                np.squeeze(scores),
                category_index,
                use_normalized_coordinates=True,
                line_thickness=3)
            # Show image with detection
            cv2.imshow(title, cv2.cvtColor(image_np, cv2.COLOR_BGR2RGB))
            # Bellow we calculate our FPS
            fps += 1
            TIME = time.time() - start_time
            if (TIME) >= display_time:
                print("FPS: ", fps / (TIME))
                fps = 0
                start_time = time.time()
            # Press "q" to quit
            if cv2.waitKey(25) & 0xFF == ord("q"):
                cv2.destroyAllWindows()
                break
Same as in the previous tutorial, we are testing how fast it is working. We take the same picture with the same object count to compare the results we got in the 3-rd tutorial part. In the below image, you can see a significant difference comparing what we had before, and it is on average 1 FPS. If you run it on GPU, you will get from 5 to 10 times boost.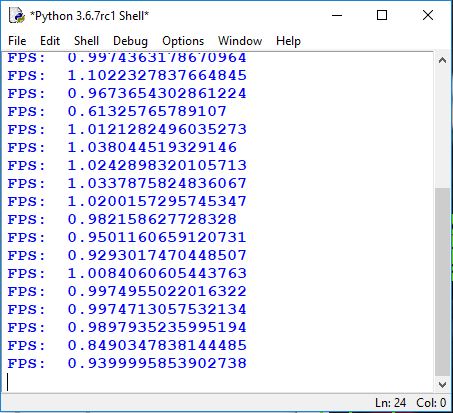
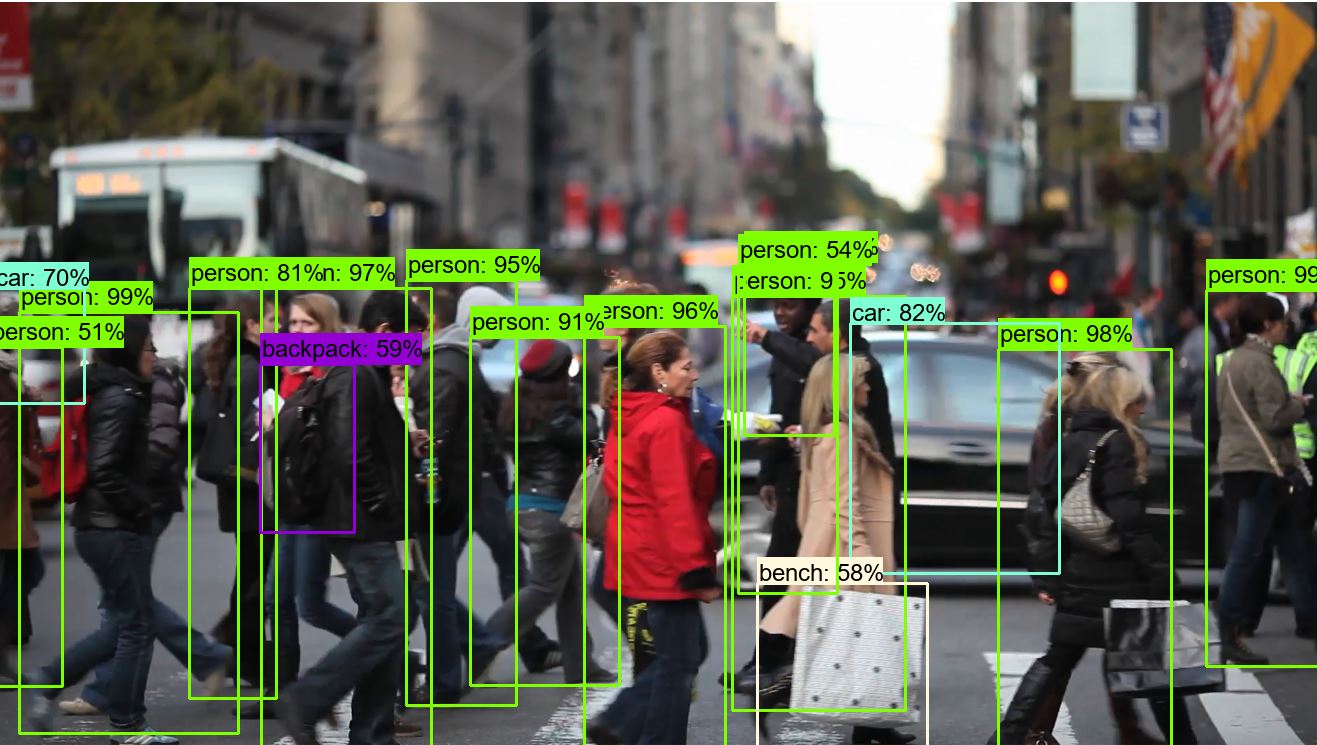
And here is our picture with detected objects:
In this tutorial, we were working with code from the 3-rd tutorial part. Here we cleaned the code, and mostly we were working with the while loop. We made it to work as fast as possible we can right now. Next, our goal is to make our custom training data.