Welcome everyone to part 10 of the web development in Python with Django. In this part, we will continue to improve our code by getting familiar with decorators. We'll implement some changes to allow users to log in not only with a username but also with an email.
Decorators in Django:
Python's Decorators are an advanced feature that all python programmers should be familiar with. When you learn how to create them, you may regret that you haven't used them before. Usually, you use a decorator when you need to change a function's behavior without modifying it. For example, when you want to add logging, do a test, verify permissions, perform caching, etc.
I am writing decorator in this tutorial because we'll run the same function on multiple functions. This avoids you writing a duplicating code inside. If you were following my previous tutorials, we already were using decorators to check whether a user is logged in before logging out; we used @login_required. Right now, we want to check whether the user is logged in into the user before trying to access other functions.
To create a Python Decorator function, we create an external function that takes the function as an argument. There is also an internal function that wraps the decorated function. Here's the syntax for the basic Python decorator:
def my_decorator_func(func):
    def wrapper_func():
        # Do something before the function.
        func()
        # Do something after the function.
    return wrapper_func
Let's head to our user application and create a "decorators.py" script. Inside I place the following code:
# django_project/users/decorators.py
from django.shortcuts import redirect

def user_not_authenticated(function=None, redirect_url='/'):
    """
    Decorator for views that checks that the user is NOT logged in, redirecting
    to the homepage if necessary by default.
    """
    def decorator(view_func):
        def _wrapped_view(request, *args, **kwargs):
            if request.user.is_authenticated:
                return redirect(redirect_url)

            return view_func(request, *args, **kwargs)

        return _wrapped_view

    if function:
        return decorator(function)

    return decorator
Here we are creating a decorator to check whether the user is authenticated or not. We'll use this decorator where we believe logged-in users shouldn't be able to access it. As I mentioned, we create a function inside a function that we call a decorator, and to access a Django request, we again create another specific function that we call a "_wrapped_view". Here, we check if a user is authenticated; if it is, we return a redirect function. Otherwise, we redirect the original function the user is trying to access. Not to make it too complicated, let's leave it as it is; it will do the hard work we want. For more detailed information about decorators, you may navigate to Django's official documentation about decorators.
Let's head to our "django_project/users/views.py" script and apply this decorator. We use a decorator by placing the decorator's name directly above the function we want to use it on. You prefix the decorator function with a @ symbol. We'll apply this decorator to two of our functions, its register, and custom_login functions. For these functions, we remove these lines of code:
if request.user.is_authenticated:
    return redirect('/')
We import our new "decorator with from .decorators import user_not_authenticated" and we decorate the functions mentioned above in the following way:
# django_project/users/views.py
...
from .decorators import user_not_authenticated

# Create your views here.
@user_not_authenticated
def register(request):
    ...

@user_not_authenticated
def custom_login(request):
    ...
These decorators make our code way tidier and easier to read. This is one of the simplest Decorators that we can begin with while creating a Django project. We can make them way more complex, which would help us keep our code simple to read and understand.
Log in with an email:
Despite Django's simplicity and delightful development experience, one of the things that I personally and many other developers don't like about Django is its default authentication system. Most websites use only an email authentication system or both. I don't know why they're doing this, but logging in with a username doesn't meet the web industry standards for me.
We can fix this quickly by implementing some workaround hacks. Let's take a look at the steps on how to enable your users to log in with their emails in your Django apps.
Right now, we are using the default built-in Django AuthenticationForm. So, we need to create a custom one and make sure that our view asks for the right data for input; we head to our "django_project/users/forms.py" script a create a new UserLoginForm object:
# django_project/users/forms.py
from django.contrib.auth.forms import AuthenticationForm
...
class UserLoginForm(AuthenticationForm):
def __init__(self, *args, **kwargs):
super(UserLoginForm, self).__init__(*args, **kwargs)
username = forms.CharField(widget=forms.TextInput(
attrs={'class': 'form-control', 'placeholder': 'Username or Email'}),
label="Username or Email*")
password = forms.CharField(widget=forms.PasswordInput(
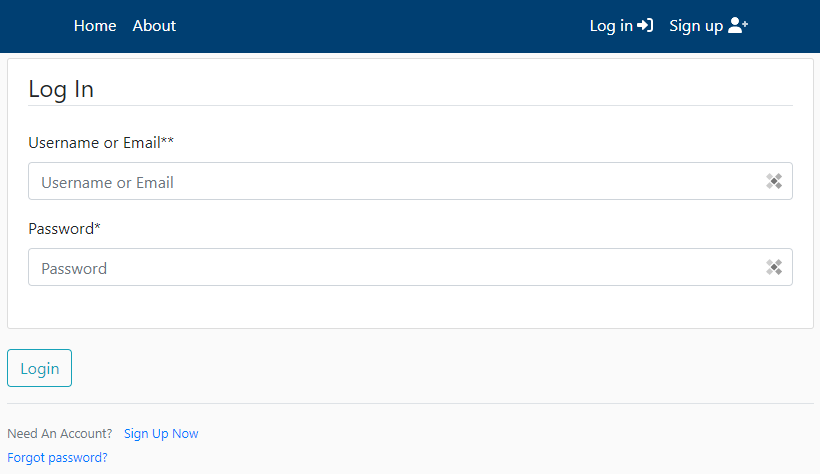
attrs={'class': 'form-control', 'placeholder': 'Password'}))As you can see, we inherit from AuthenticationForm; this way, we are sure that our new object will do all the same functions and parent. We only change the labels to inform our users that they may log in with a username or email. If we navigate back to a browser into the login section, we should see it has changed:
That's great! Yet, we still can't log in with an email. The next step is to create a new custom authentication backend for our application. This allows us to override the default logic of our authentication system since we're trying to enable our users to log in with their username or email. We head back to our user's application and we create backends.py script with the following code inside:
# django_project/users/backends.py
from django.contrib.auth.backends import ModelBackend
from django.contrib.auth import get_user_model
from django.db.models import Q

UserModel = get_user_model()

class EmailBackend(ModelBackend):
    def authenticate(self, request, username=None, password=None, **kwargs):
        try:
            user = UserModel.objects.get(Q(username__iexact=username) | Q(email__iexact=username))
        except UserModel.DoesNotExist:
            UserModel().set_password(password)
            return
        except UserModel.MultipleObjectsReturned:
            user = UserModel.objects.filter(Q(username__iexact=username) | Q(email__iexact=username)).order_by('id').first()

        if user.check_password(password) and self.user_can_authenticate(user):
            return user
Without getting deep into the details of this object, when we get a POST request for a login before, we were checking if the right username was given to us. Now, we check whether the given username exists in the username or email database user fields. If we receive a match for the right email or username, together with the password, we return an authenticated user.
Next, we need to modify our default Django authentication backend. We head to our "django_project/django_website/settings.py" and somewhere at the end, we insert the "AUTHENTICATION_BACKENDS = ['users.backends.EmailBackend']" line; this will override the default Django authentication to use our created object.
There is one more step to do to make it work. If you are using a default Django AuthenticationForm, you don't need to do this step. Otherwise, we head back to our "django_project/users/views.py" and replace where we used AuthenticationForm to use our new UserLoginForm. Here is the complete code for our views.py function:
# django_project/users/views.py
from django.shortcuts import render, redirect
from django.contrib.auth import login, logout, authenticate
from django.contrib import messages
from django.contrib.auth.decorators import login_required

from .forms import UserRegistrationForm, UserLoginForm
from .decorators import user_not_authenticated

# Create your views here.
@user_not_authenticated
def register(request):
    if request.method == "POST":
        form = UserRegistrationForm(request.POST)
        if form.is_valid():
            user = form.save()
            login(request, user)
            messages.success(request, f"New account created: {user.username}")
            return redirect('/')

        else:
            for error in list(form.errors.values()):
                messages.error(request, error)

    else:
        form = UserRegistrationForm()

    return render(
        request=request,
        template_name="users/register.html",
        context={"form": form}
        )

@login_required
def custom_logout(request):
    logout(request)
    messages.info(request, "Logged out successfully!")
    return redirect("homepage")

@user_not_authenticated
def custom_login(request):
    if request.method == "POST":
        form = UserLoginForm(request=request, data=request.POST)
        if form.is_valid():
            user = authenticate(
                username=form.cleaned_data["username"],
                password=form.cleaned_data["password"],
            )
            if user is not None:
                login(request, user)
                messages.success(request, f"Hello <b>{user.username}</b>! You have been logged in")
                return redirect("homepage")

        else:
            for error in list(form.errors.values()):
                messages.error(request, error)

    form = UserLoginForm()

    return render(
        request=request,
        template_name="users/login.html",
        context={"form": form}
        )
Now, we save everything and head back to our website to test this out! Everything works as expected!
Conclusion:
In this part, I showed you how to create and use Python decorators, along with a real-world example. Now I hope that you will be able to add decorators to your other projects.
Sometimes it's tough to remember what username we use on one or another website. I found that this method is one of the easiest ways to achieve our goal quickly. Also, we added an excellent feature for our users. From now on, they will be able to log in not only with a username but also with email.
Sometimes we want to protect our website from bots, so in the next tutorial part, we'll check how to implement reCAPTCHA into our website as a security feature! See you in the next part.
See you in my next tutorial, final tutorial files you can download from my GitHub page.