Welcome everyone to part 18 of the web development in python with Django. In the previous tutorial, I showed you how we could upload images inside our Django project while we write or create some article, tutorial, post, or whatsoever.
The post might be anything. It might be your product, your article, your blog stuff, or anything else you would like. So I showed you that it's pretty easy to expand functionality while adding some code lines inside our code without creating a new application.
Nowadays, almost all websites have the subscription button when the user isn't required to register his account to subscribe to the newsletter. And the newsletter can be anything from tutorials, articles, products, or anything you can imagine.
So I decided that it would be great to add such functionality because sometimes users would like to have this option. For example, I have this option on my personal www.pylessons.com website, and I see that people want to subscribe to my newsletter.
They do so because they do not benefit from registering a new account on my website or don't want to do so. They are interested only in the posts I publish.
Subscription functionality:
Let's create a footer template in the "django_project/main/templates/main" directory. Usually, subscription buttons are at the end of the website, with a name and the subscription email input. This should make sense where we'll insert our footer template.
<-- django_project/main/templates/main/footer.html -->
<footer class="footer-color text-center footer-text">
    <div class="container p-4">
        {% if not user.is_authenticated %}
            <section class="">
                <form action="{% url 'subscribe' %}" method="post">
                    <div class="row d-flex justify-content-center">
                    {% csrf_token %}

                        <div class="col-auto">
                            <p class="pt-2">Subscribe for our newsletter</p>
                        </div>

                        <div class="col-auto">
                            <input id="name" name="name" class="form-control" placeholder="Your Name"/>
                        </div>

                        <div class="col-auto">
                            <input id="email" name="email" type="email" class="form-control" placeholder="Email address"/>
                        </div>

                        <div class="col-auto">
                            <button type="submit" class="btn btncolor">
                                <i class="fa fa-arrow-circle-right fa-lg"></i>
                            </button>
                        </div>
                    </div>
                </form>
            </section>
        {% endif %}
        <div class="row mobiledevice">
            <div class="col-lg-4 col-md-4 col-sm-4 text-left">
                <a href="/">
                    <h4>Disclaimer</h4>
                </a>
            </div>
            <div class="col-lg-4 col-md-4 col-sm-4 text-left">
                <h4>Information</h4>
            </div>
            <div class="col-lg-4 col-md-4 col-sm-4 text-left">
                <a href="/">
                    <h4>About</h4>
                </a>
            </div>
        </div>

    </div>
    <div class="text-center p-3" style="background-color: rgba(0, 0, 0, 0.2);">
        <p>© {% now "Y" %} Copyright:
            <a href="https://PyLessons.com/">PyLessons.com</a>
        </p>
    </div>
</footer>
As you can see, our template is pretty simple; there is a username and email input fields, submit button, and some additional information at the end. And also, there is a copyright text that automatically updates the year as time passes.
To have this footer on all our website pages, we go to our "django_project/main/templates/main/header.html" template, and we insert "{% include 'main/footer.html' %}" code in line 38:
<-- django_project/main/templates/main/header.html -->
...
{% include 'main/footer.html' %}
...
Now, if I go back to our website and refresh it, we can see the footer:
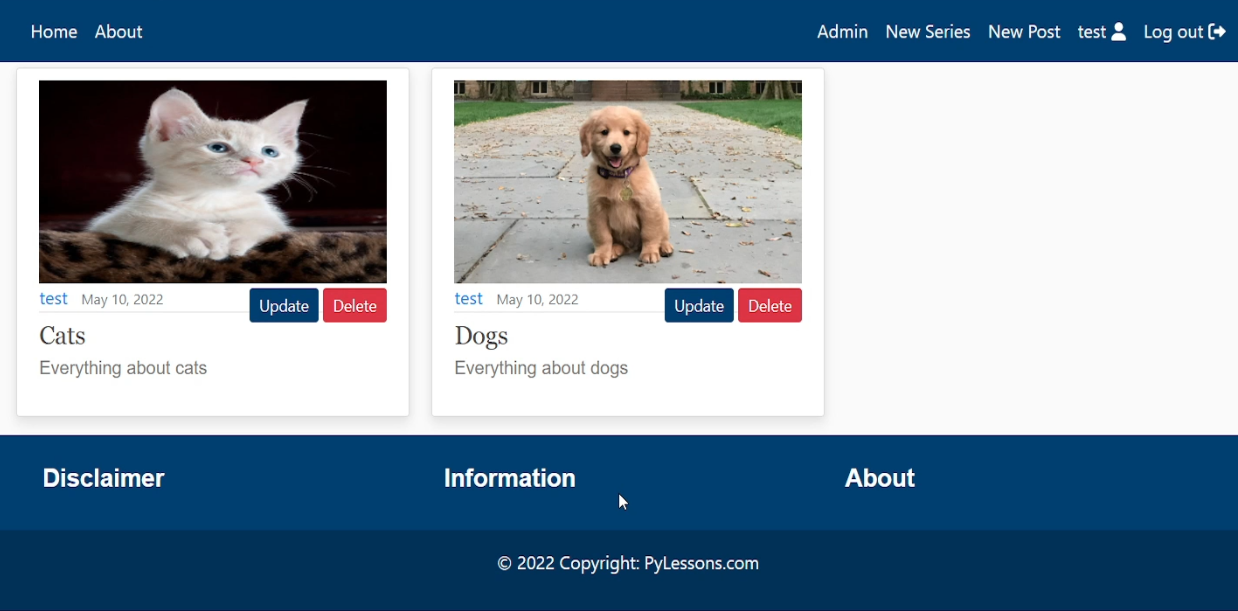
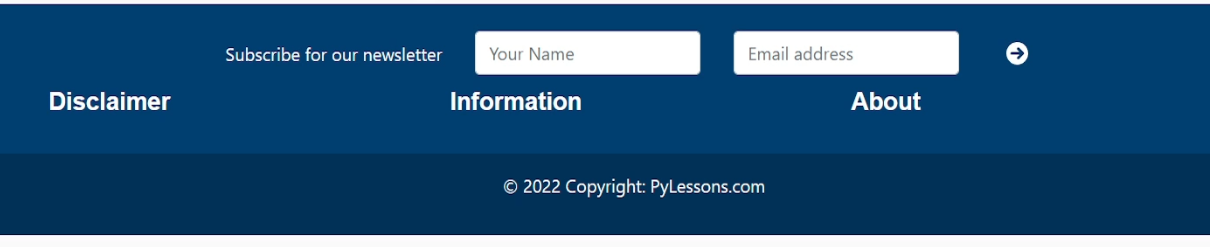
But as you can see, there are no name and email fields as input to subscribe. This is because we are logged in to the account. Users with an account are not asked to subscribe; they can do this in their profile. So, let's sign out of our account, and now we should see subscription fields in our footer:
 These are the additional lines in our "
.css" file that I use to style our footer:
/* django_project/main/static/main/main.css */
...
.site-footer .navbar-nav .nav-link {
  color: var(--brightText);
}

.site-footer .navbar-nav .nav-link:hover {
  color: #ffffff;
}

.site-footer .navbar-nav .nav-link.active {
  font-weight: 500;
}

.footer-text h4, .footer-text p, .footer-text a {
  color: var(--brightText);
}

.footer-text a:hover {
  color: #ffffff;
}
Now we need to create an URL for the subscription. Let's head to our users application "django_project/users/urls.py" and insert a new path that targets another "subscribe" function that we'll create in our views:
# django_project/users/urls.py
from django.urls import path
from . import views

urlpatterns = [
    path('subscribe', views.subscribe, name='subscribe'),
    ...
]
Great, now let's create the subscribe function in "django_project/users/views.py". For now, let's make it simple and redirect users back to the homepage:
# django_project/users/views.py
...
def subscribe(request):
    if request.method == 'POST':
        return redirect("/")
We know we'll need to save subscribed users metadata in our database, but we don't have such a table yet. So, we head to the "django_project/users/models.py" and create a new object, "SubscribedUsers". This model will store the name, email, and the date time when the user subscribed:
# django_project/users/models.py
from django.utils import timezone
...
class SubscribedUsers(models.Model):
    name = models.CharField(max_length=100)
    email = models.EmailField(unique=True, max_length=100)
    created_date = models.DateTimeField('Date created', default=timezone.now)

    def __str__(self):
        return self.email
Now, we apply these changes and save them in the database:
python manage.py makemigrations
python manage.py migrate
Now we need to complete our subscribe function our views:
# django_project/users/views.py
...
from django.core.validators import validate_email
from django.core.exceptions import ValidationError
from .models import SubscribedUsers
...
def subscribe(request):
if request.method == 'POST':
name = request.POST.get('name', None)
email = request.POST.get('email', None)
if not name or not email:
messages.error(request, "You must type legit name and email to subscribe to a Newsletter")
return redirect("/")
if get_user_model().objects.filter(email=email).first():
messages.error(request, f"Found registered user with associated {email} email. You must login to subscribe or unsubscribe.")
return redirect(request.META.get("HTTP_REFERER", "/"))
subscribe_user = SubscribedUsers.objects.filter(email=email).first()
if subscribe_user:
messages.error(request, f"{email} email address is already subscriber.")
return redirect(request.META.get("HTTP_REFERER", "/"))
try:
validate_email(email)
except ValidationError as e:
messages.error(request, e.messages[0])
return redirect("/")
subscribe_model_instance = SubscribedUsers()
subscribe_model_instance.name = name
subscribe_model_instance.email = email
subscribe_model_instance.save()
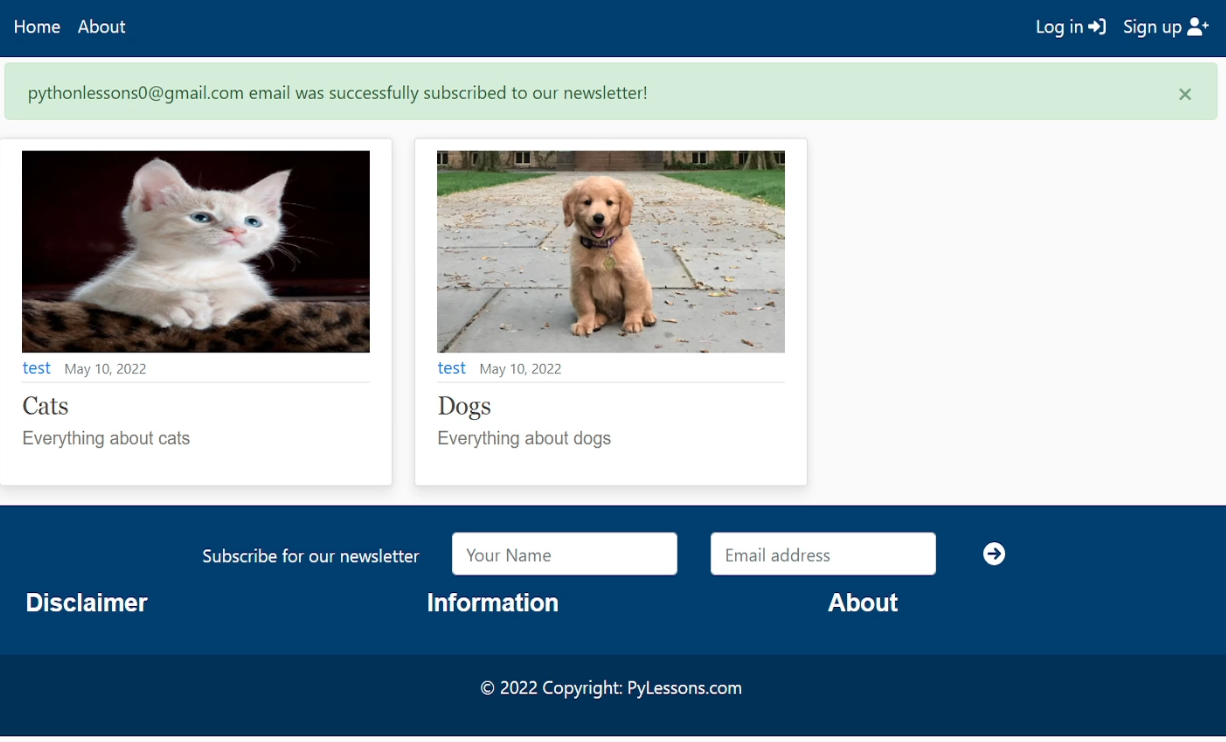
messages.success(request, f'{email} email was successfully subscribed to our newsletter!')
return redirect(request.META.get("HTTP_REFERER", "/"))We do several checks here. First, we check whether the given name and email are not empty. Secondly, we check whether the given email exists in our users database; if it does, we return that message to the user. Third, we check if the given email is not in the subscribed users list. And the last, we check if the given email passes Django email validation. The user is saved to the subscribed user database if given details pass all four validation steps.
Let's test this by subscribing with a valid email address:
Now, let's log in to our admin user account and navigate to the admin panel page. We are missing a table where we can see all the subscribed users. Let's add this table by registering the "SubscribedUsers" model to the admin site:
# django_project/users/admin.py
from django.contrib import admin
from .models import CustomUser, SubscribedUsers

class SubscribedUsersAdmin(admin.ModelAdmin):
    list_display = ('email', 'name', 'created_date')

admin.site.register(CustomUser)
admin.site.register(SubscribedUsers, SubscribedUsersAdmin)
Here we are using a list display, so we could display all columns our model has:
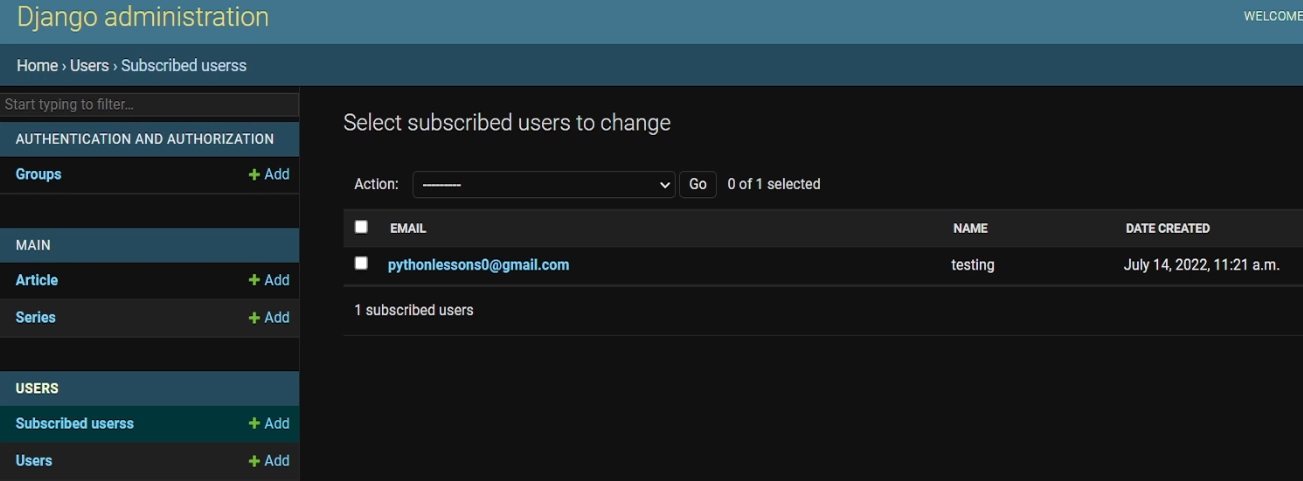
Now we can review all subscribed users names and emails and the date when they subscribed to a newsletter.
Newsletter functionality:
So, what would be the purpose of collecting our subscriber's emails without using them? One of the ways our subscribers and we would benefit is if we could send them a newsletter about our new publications, important information, etc. That's a great idea; we'll implement such functionality that we would be able to create a newsletter the same way as we make a new record!
We start by creating a new "newsletter" URL in our main application, the "urls.py" script:
# django_project/main/urls.py
from django.urls import path
from . import views

urlpatterns = [
    path("newsletter", views.newsletter, name="newsletter"),
    ...
]
This URL requires us to have a "newsletter" function in our "django_project/main/views.py" script. So, let's start building this function by creating a basic one:
# django_project/main/views.py
...

@user_is_superuser
def newsletter(request):
    return redirect('/')
This function now redirects us to the homepage; we'll return to it!
For convenient newsletter writing, we need to have a specific form where we would be able to type HTML code. We head to "django_project/main/forms.py", and we add the following code snippet:
# django_project/main/forms.py
from tinymce.widgets import TinyMCE

...

class NewsletterForm(forms.Form):
    subject = forms.CharField()
    receivers = forms.CharField()
    message = forms.CharField(widget=TinyMCE(), label="Email content")
Here, the subject will be our email title, the receivers will be collected automatically from our subscriber's database, and the message is our HTML message that we'll send to users.
Now we have a form that we'll fill out and we'll use to send to our subscribers, but we need to display it on the front end. Let's navigate to the "django_project/main/templates/main" path, and let's create a "newsletter.html" template with the following code:
<-- django_project/main/templates/main/newsletter.html -->
{% extends "main/header.html" %}
{% load crispy_forms_tags %}
{% block content %}
    <div class="content-section">
        <form method="POST">
            {% csrf_token %}
            {{ form|crispy  }}
            {{ form.media  }}
            <div class="form-group">
                <button class="btn btn-outline-info" type="submit">Send</button>
            </div>
        </form>
    </div>
{% endblock content %}
That's a pretty simple template. We display the form as crispy and as media and use it as a POST submission.
Let's continue working on our newsletter function in the "django_project/main/views.py" script:
# django_project/main/views.py
from django.contrib import messages
from django.core.mail import EmailMessage

from .forms import NewsletterForm
from users.models import SubscribedUsers

...

@user_is_superuser
def newsletter(request):
    form = NewsletterForm()
    form.fields["receivers"].initial = ','.join([active.email for active in SubscribedUsers.objects.all()])

    return render(request=request, template_name='main/newsletter.html', context={"form": form})
It will not work yet, but let's check whether our code works as expected. Now, our goal is to get all our subscribers from the database and by default, place subscribers email into the form. Let's check if our form works:
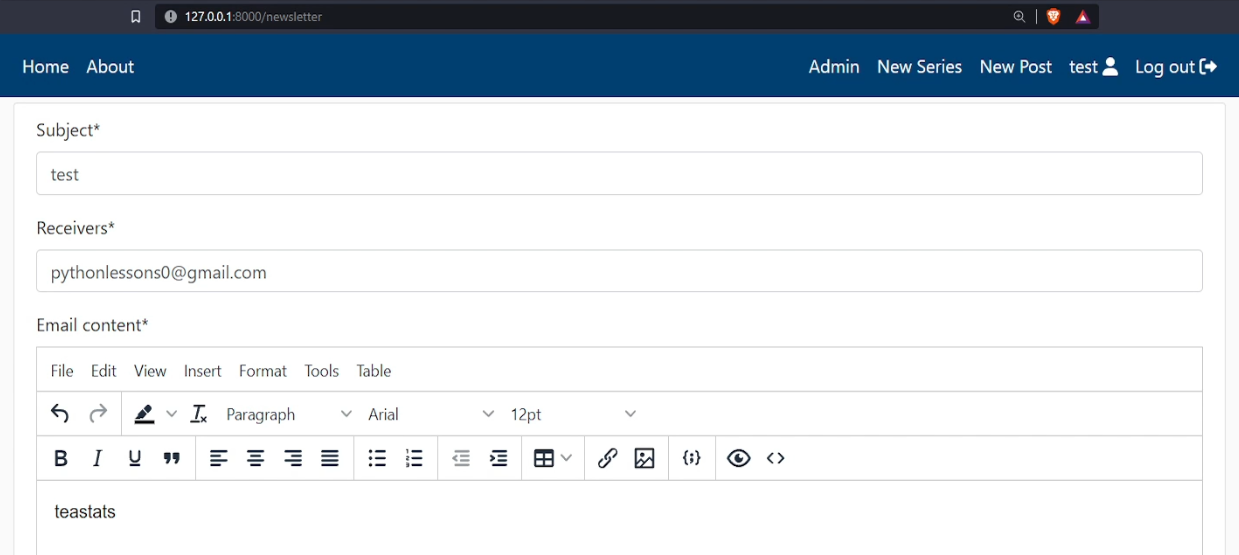
Nice! We can fill our form with any text we want, but if we press submit - nothing will happen. We need to complete our function to submit the information we type; let us do so:
# django_project/main/views.py
from django.contrib import messages
from django.core.mail import EmailMessage

from .forms import NewsletterForm
from users.models import SubscribedUsers

...

@user_is_superuser
def newsletter(request):
    if request.method == 'POST':
        form = NewsletterForm(request.POST)
        if form.is_valid():
            subject = form.cleaned_data.get('subject')
            receivers = form.cleaned_data.get('receivers').split(',')
            email_message = form.cleaned_data.get('message')

            mail = EmailMessage(subject, email_message, f"PyLessons <{request.user.email}>", bcc=receivers)
            mail.content_subtype = 'html'

            if mail.send():
                messages.success(request, "Email sent succesfully")
            else:
                messages.error(request, "There was an error sending email")

        else:
            for error in list(form.errors.values()):
                messages.error(request, error)

        return redirect('/')

    form = NewsletterForm()
    form.fields['receivers'].initial = ','.join([active.email for active in SubscribedUsers.objects.all()])
    return render(request=request, template_name='main/newsletter.html', context={'form': form})
Code works pretty simple; we get the subject, receivers, and the message from our filled form. We construct an email object where we put our information, but as receivers, we put bcc to send a newsletter to all subscribers at once, and the receivers won't be able to see other contact details. If the message is sent successfully, we display such a message; otherwise, we display an error message. Let's give it a go with the following text in a form:
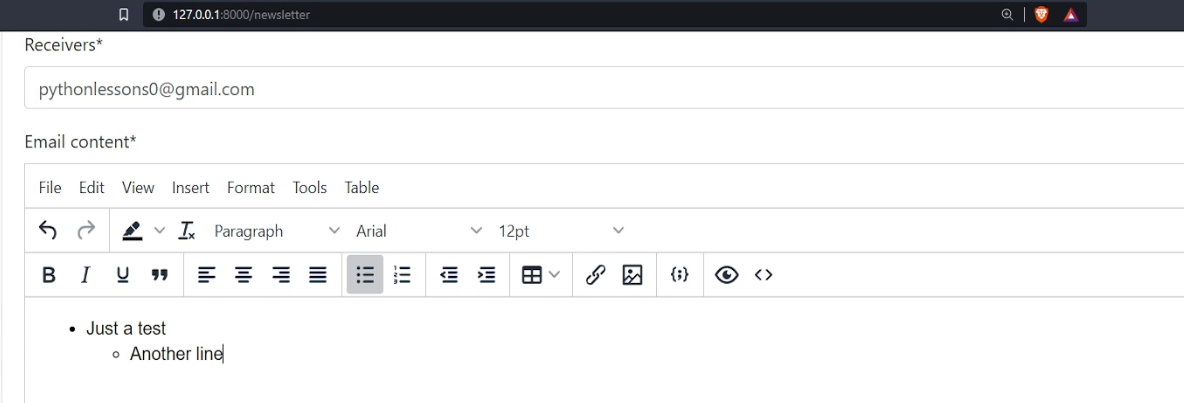
Now let's go to my mail, and we should see a new email with HTML code in it:
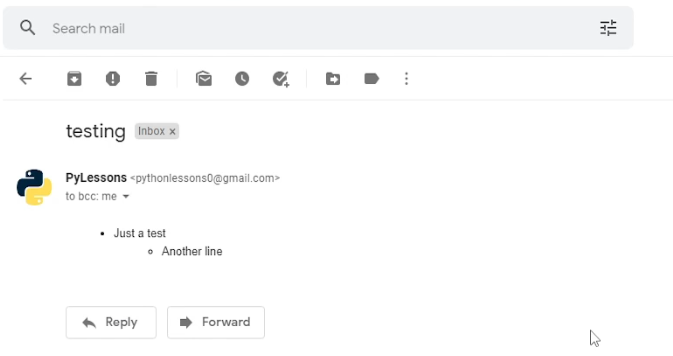
That's amazing, and everything worked as expected! We filled a form in our website front end, submitted it, and immediately received it in our mailbox! That's cool!
Conclusion:
So, as we can see, it was pretty easy to implement subscription functionality into our Django project. Now it is up to our users if they want to subscribe to the newsletter or register their user account.
At the same time, we implemented functionality to send a newsletter to our subscribers. And more importantly, we can create this newsletter email on our website front end using HTML, which means our mail may be way more attractive than plain text!
Everything was pretty straightforward. I hope this short tutorial was helpful to you!
See you in my next tutorial, final tutorial files you can download from my GitHub page.