With Colab, you can develop deep learning applications on the GPU for free. It doesn't mean that you will be able to train only the Yolo model; we can train any model we want with the same technique.
Is the training Process Smooth???
Let's see some minor issues.
- While trying to connect to GPU runtime, it sometimes throws an error saying it can't connect. That's due to the heavy number of people trying to use the service. But Google plans to add more GPU machines;
- Sometimes, the runtime dies intermittently. There may be many underlying causes for this.
- The amount of ram available is ~13GB which is too good to be given for free. But we are talking about object detection, computer vision, and machine learning to face memory warnings with large models;
- Google Colab is a free service offered by Google where you can run python scripts and use machine learning libraries taking advantage of their powerful hardware. It's for free with the only disadvantage; you can use it for 12 hours in a row. After that, you'll be disconnected, and your files will be deleted. You can restart it again, but you'll need to do everything from scratch;
- All in all, if we would plan to train a large model, we may face memory and space issues. To solve 12 hours issue and file loss problem, we can connect Google Colab with Google Drive to avoid losing the files in case of disconnection!
- Repeat.
In this tutorial, I will explain one of the easiest ways to train YOLO v3 to detect a custom object if you don't have a computer with a strong GPU.
You will need just a simple laptop (Windows, Linux, or Mac), as the training will be done online, taking advantage of the free GPU offered by google.
We can train Yolo to detect a custom object. I chose, for example, to train to detect a car license plate; you can select anything you prefer. In this part, I am not talking about dataset preparation. You can check it in my two previous tutorials (Link1 and Link2).
1. Prepare the Image dataset
As I said, I am not talking about dataset preparation in this part. But I recommend preparing the dataset, configuring the configs.py script, and checking if training starts at least locally for you. If training works, this means we can move to Google Colab. If you don't know how to do this step, you can check my two previous tutorials: Link1 and Link2.
2. Move everything to Google Colab:
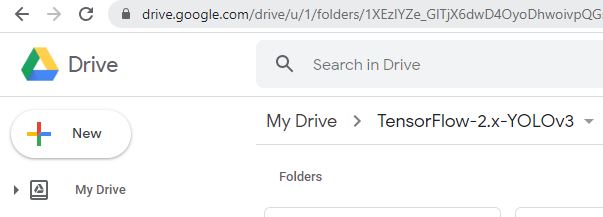
Move the prepared folder to your local Google drive directory. This should look following (same project name as my GitHub repo):
 You must be sure that all images are prepared, configurations changed according to your needs, and training works locally on the CPU.
In TensorFlow-2.x-YOLOv3, the repository, you should see YOLOv3_colab_training.ipynb file. Open it with Google Colaboratory in the following way:

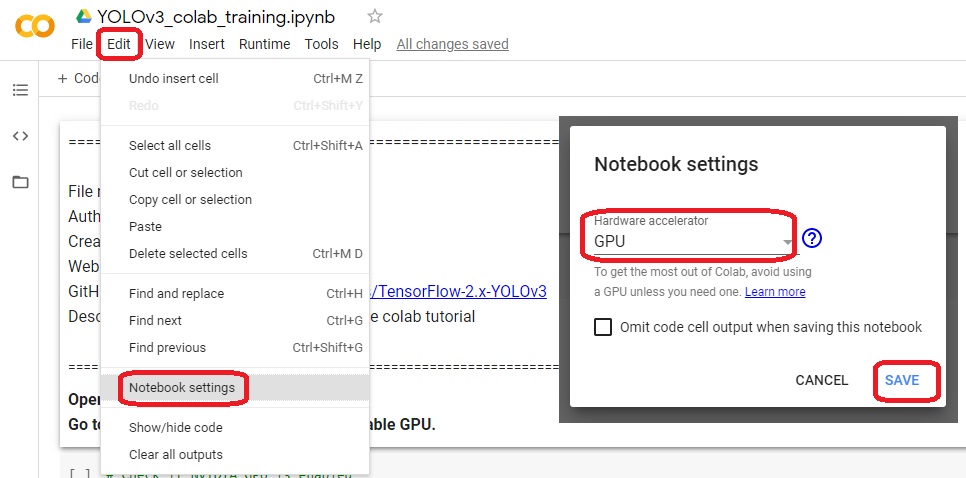
3. Set up Google Colab:
We need to enable the GPU. So, click on "Edit" -> "Notebook settings", select "GPU", and click "SAVE:
 Now, we may run the first cell (click on cell and pres CTRL+SHIFT) to Check if NVIDIA GPU is enabled. You may see a similar result:
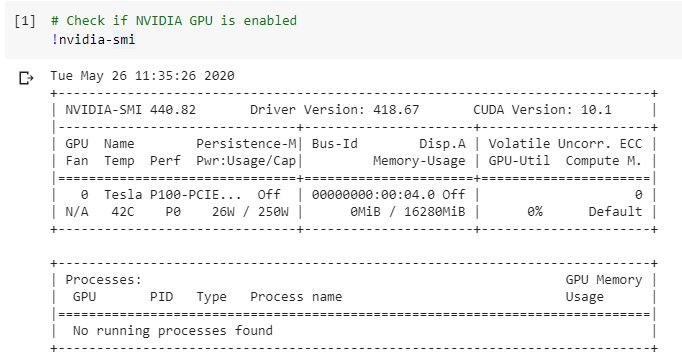 In my example, I received the NVIDIA Tesla P100 GPU, as you can see, which is quite fast for our training.
Now we're ready to connect Colab with our Google Drive. To do so, run the cell where it's written from google.colab import drive and then click on the link that appears:
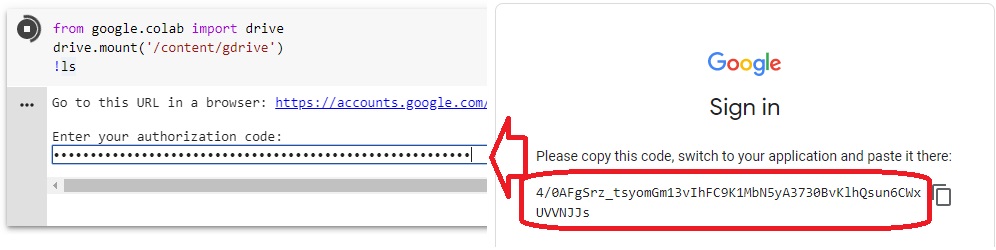
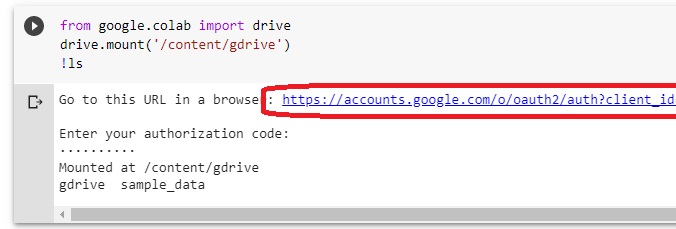 This link is used to grant access to your Google Drive. Once you enter, it asks you to allow the Google Drive File Stream. Click on "Allow". And then copy the code that appears:
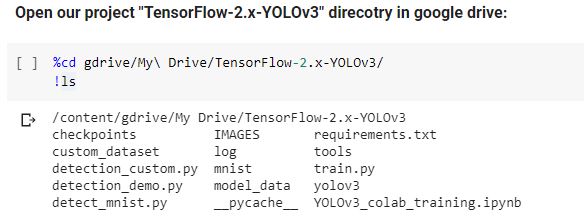
 Now, our Colab is ready for further use with our Google Drive files. The last step is to open our project directory by running next following cell:
 To make sure that our Colab has all necessary libraries for our YOLO v3 project, we may install libraries from the requirements.txt file:
 To make utterly sure that TensorFlow works with GPU, we can run the following code lines:
import tensorflow as tf
print(tf.__version__)
tf.test.gpu_device_name()
In the output, we should see similar results:
2.2.0
'/device:GPU:0'
This means that we are using TensorFlow with the 2.2.0 version, and the system sees one GPU.
4. Test YOLO v3 object detection on Google Colab:
If everything works without issues, we are ready to test object detection on the cloud. To do this, I copied a code sample from my detection_demo.py script:
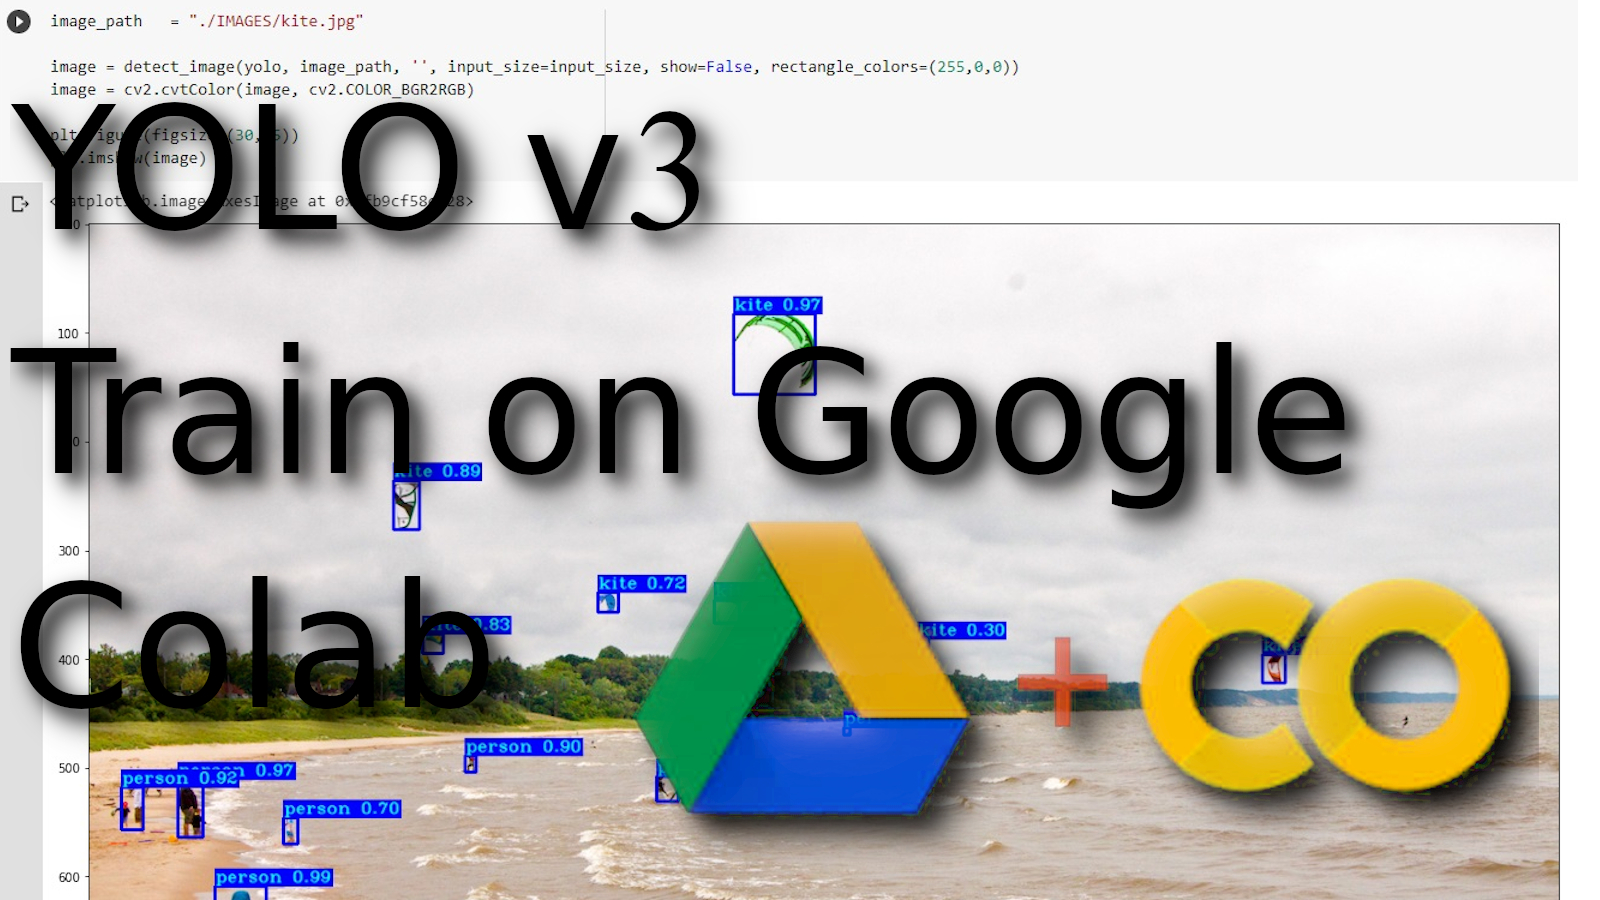
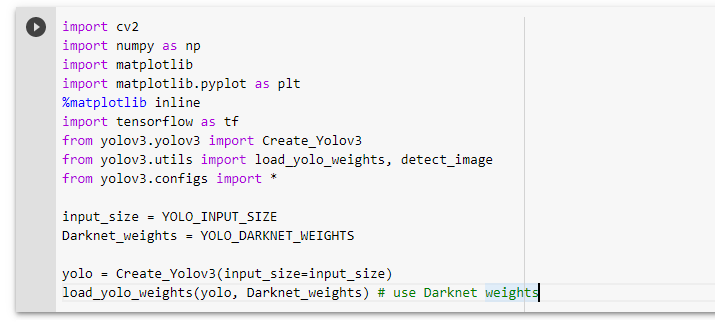 We use this cell to create the YOLOv3 model with original weights. With the next cell, we test detection with the original model on the
 kite.jpg image:
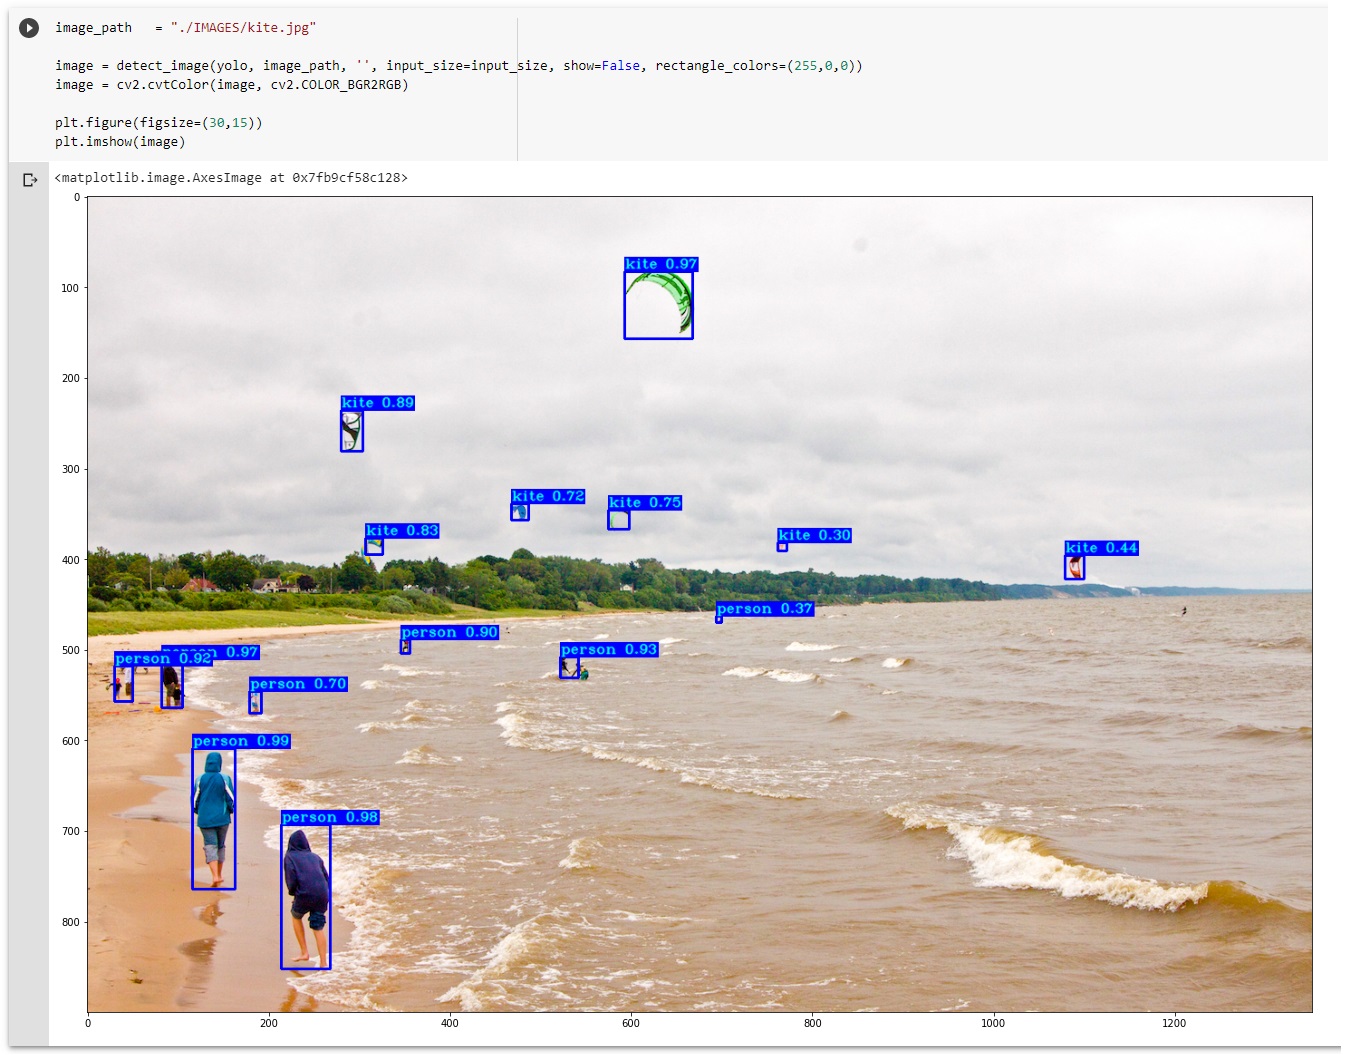 You can test whatever picture you want; just put your image into the IMAGES folder on your Google Drive repository and change
 image_path = "./IMAGES/kite.jpg" image path.
5. Train YOLOv3 custom model:
First, because our dataset location changed from what we had in our annotations file, we should rerun the XML_to_YOLOv3.py script to convert XML files to YOLOv3 annotations files according to our new location in Google Drive. To do that, we run the following cell:
!python tools/XML_to_YOLOv3.py
After if finished, we are ready to start the training process with the following cell:
from train import *
tf.keras.backend.clear_session()
main()
The first epoch may take longer, but don't worry; the training process will get momentum after a few epochs. While training, the model will be saved in the checkpoints folder; later, you can download files in it to test custom detection locally.
The disadvantage with Colab training is that I can't open Tensorboard to check how my training process is performing. Maybe later, I will implement custom graph plotting if needed; now, it is how it is.
WHILE TRAINING BROWSER CAN'T BE CLOSED!
6. Test YOLOv3 custom model:
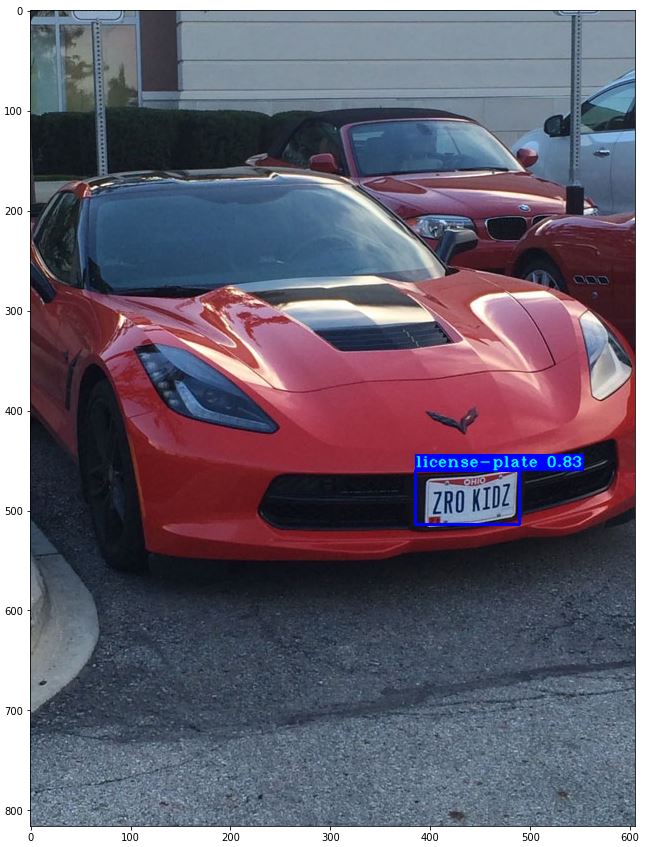
After the training is finished, we can test our custom model. First, we create a Yolo v3 custom model and load custom trained weights with the following cell:
yolo = Create_Yolov3(input_size=input_size, CLASSES=TRAIN_CLASSES)
yolo.load_weights("./checkpoints/yolov3_custom") # use keras weights
Because I was running a training process with the same dataset from the previous tutorial, I'll detect the same IMAGES/plate_2.jpg image.
Differently from my detection_custom.py We must use Matplotlib to plot images instead of OpenCV because it's a little complicated in a notebook to visualize it. So, in the detect_image script in the show parameter, I'll write False. So this is the code to test our detection with custom trained YOLOv3 model:
image_path   = "./IMAGES/plate_2.jpg"
image = detect_image(yolo, image_path, "", input_size=input_size, show=False, CLASSES=TRAIN_CLASSES, rectangle_colors=(255,0,0))
image = cv2.cvtColor(image, cv2.COLOR_BGR2RGB)
plt.figure(figsize=(30,15))
plt.imshow(image)
And here is our Custom YOLOv3 object detection results:
 So, You just trained your first Yolo v3 custom object detector on Google Colab, GOOD JOB!!
Now you can download custom trained model and run it on more images, videos, or even webcam detection!
Conclusion:
I must mention that Google is helping to reduce the entry barrier into deep learning. And a tool like this will help many people who can't afford GPU resources. I hope that this will be a fully scaled service soon and will remain free. I hope this tutorial was helpful for you and I could help you to learn something new. If you liked this tutorial, give it a clap and subscribe to my YouTube channel. See you in the next part!