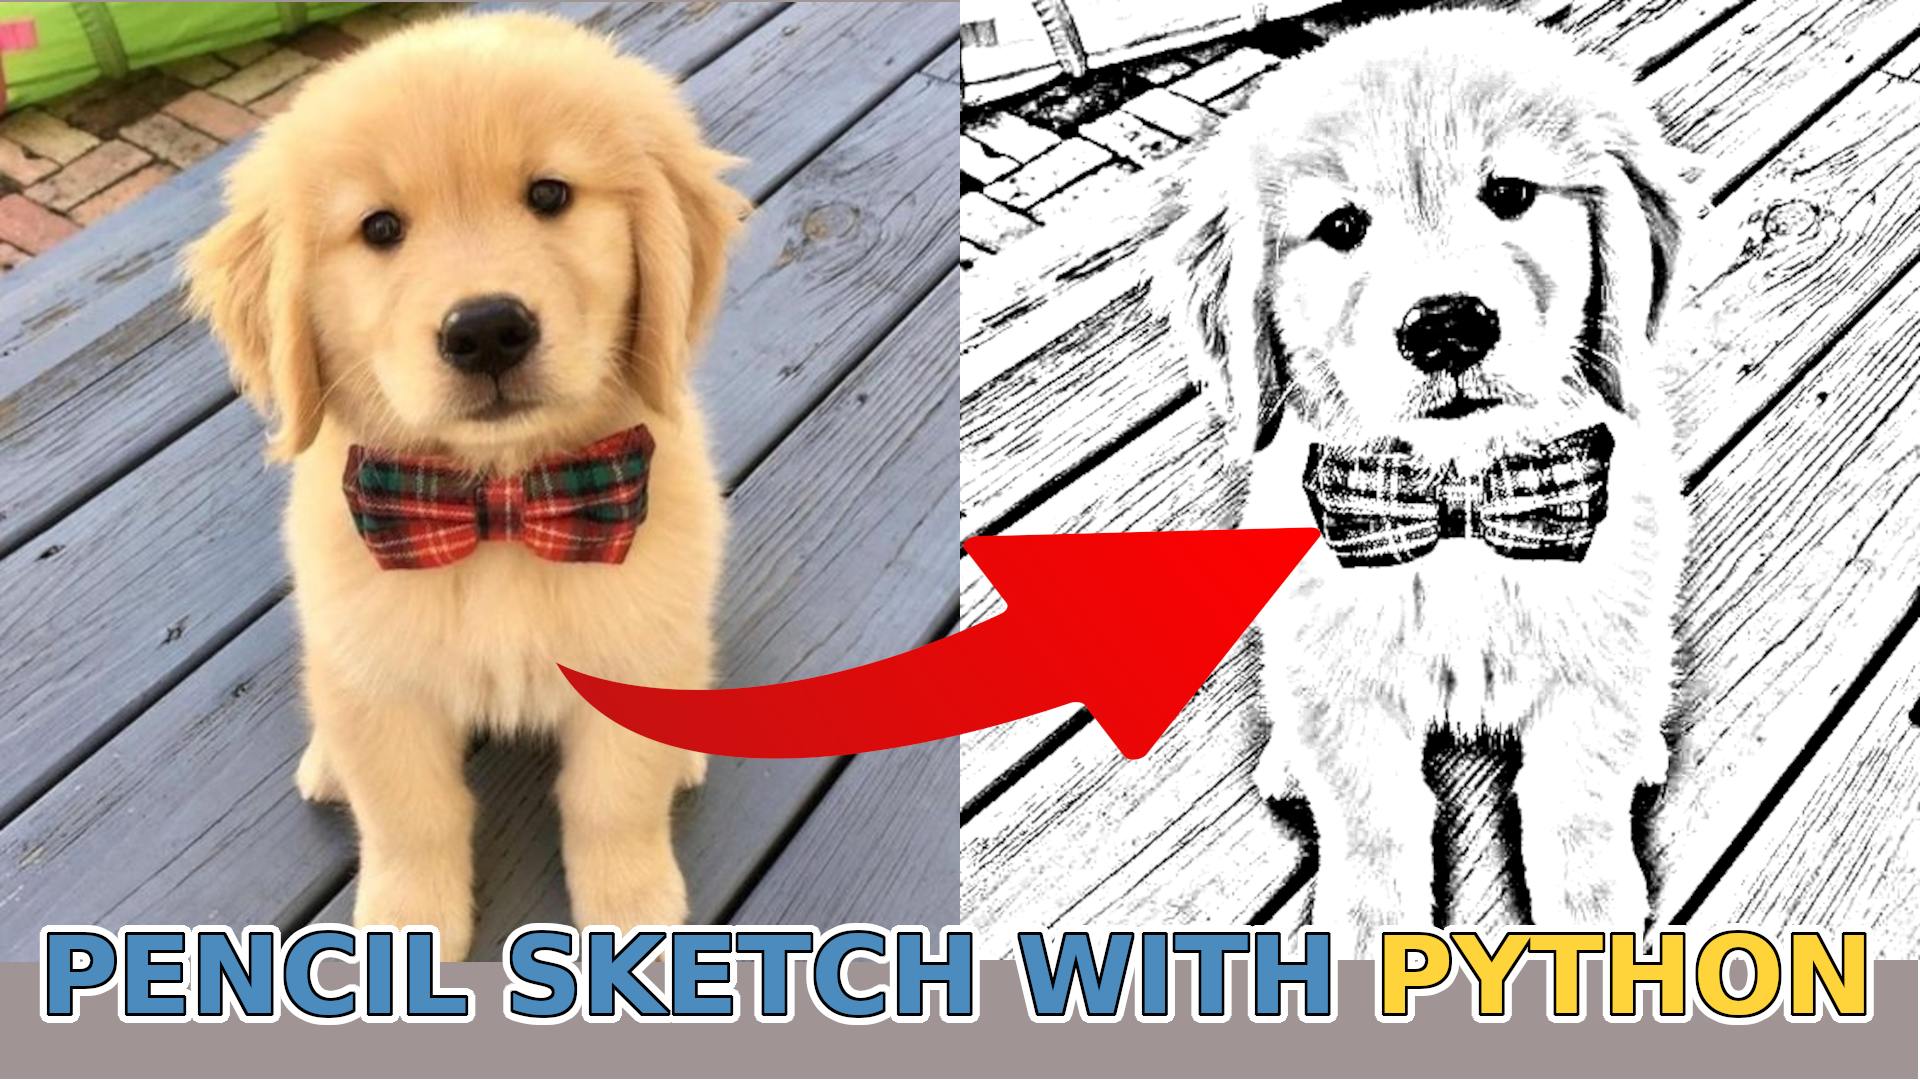
I've always been fascinated by computer vision, especially its power to manipulate images in rapid matrix multiplication. A picture is an array of numbers in Python. So we can do various matrix manipulations to get exciting results. So, in the previous tutorials, we learned how to separate ourselves from the background, detect faces, and do all of this in real-time. In this tutorial, I'll show you how we can create a "pencil" sketch image with just a few lines of code.
The process is pretty simple:
- Grayscale the image;
- Invert the colors of it;
- Blur the inverted image;
- Apply the Dodge blend to the blurred and grayscale image.
We can pick any image we want for this. But I'll demonstrate how to create an object we can apply to any image, video, or real-time stream. I'll do this to expand the functionality of the background-removal project that I am working on in this tutorial series.

Import libraries
OpenCV and Numpy are the only libraries that are needed for the project. We import them with two following lines of code:
import cv2
import numpy as np
Read Photo
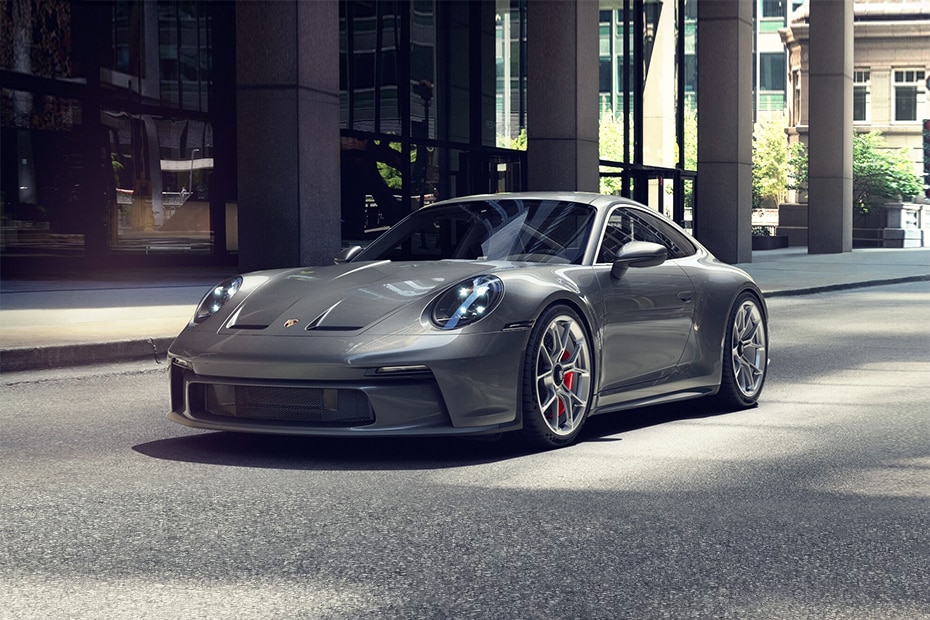
Here is one of the commands that can be used to read an image stored on a disc using OpenCV:
frame = cv2.imread("porche.png")This command reads the file "image.png" located in the current folder on the disc and stored in memory as a frame. But as I mentioned, this can be a sequence of frames or an image loaded by other methods.
Show image using OpenCV
The next important step while creating such a sketch in our project is to know how to quickly view the results without saving them on disc. The following OpenCV commands can be used to display the image on the screen:
cv2.imshow('image', frame)
cv2.waitKey(0)
cv2.destroyAllWindows()
When these lines are executed, the image will open in a new window with a title as 'image':
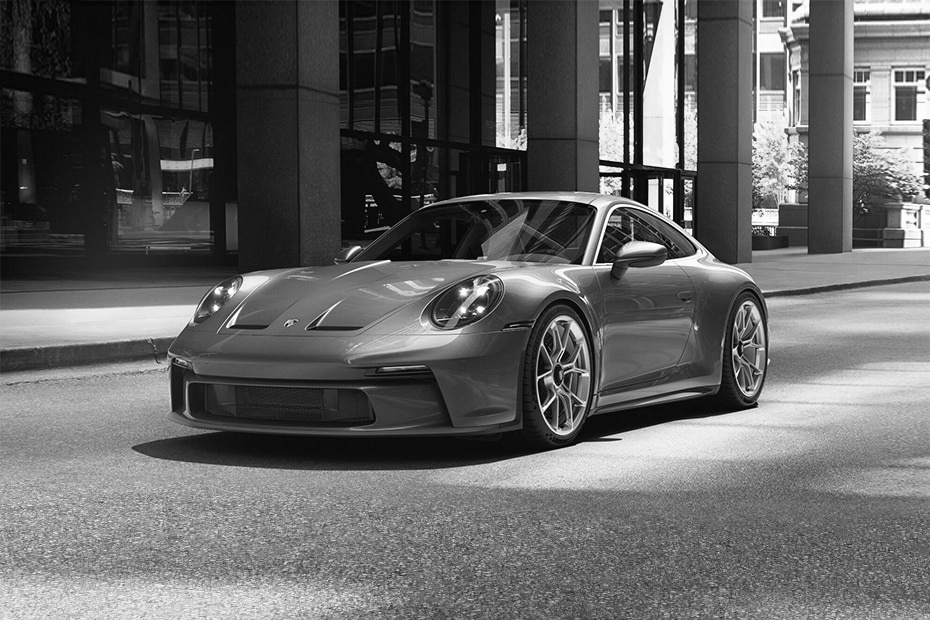
Grayscale the image
First, what we need to do with our image, is to grayscale it (convert it to black and white). We can do either with the cv2 library or numpy. But numpy doesn't have any built-in function for grayscaling. But we can easily convert our image to grayscale, knowing the math behind that. But not going into the math, the formula will look following:
grayscale = np.array(np.dot(frame[..., :3], [0.299, 0.587, 0.114]), dtype=np.uint8)
grayscale = np.stack((grayscale,) * 3, axis=-1)
Here we are multiplying RGB image channels with appropriate values and concatenating them to a single channel. Because of that, we need to return back to 3 layers image; we do it with the numpy stack function. This is what we get:
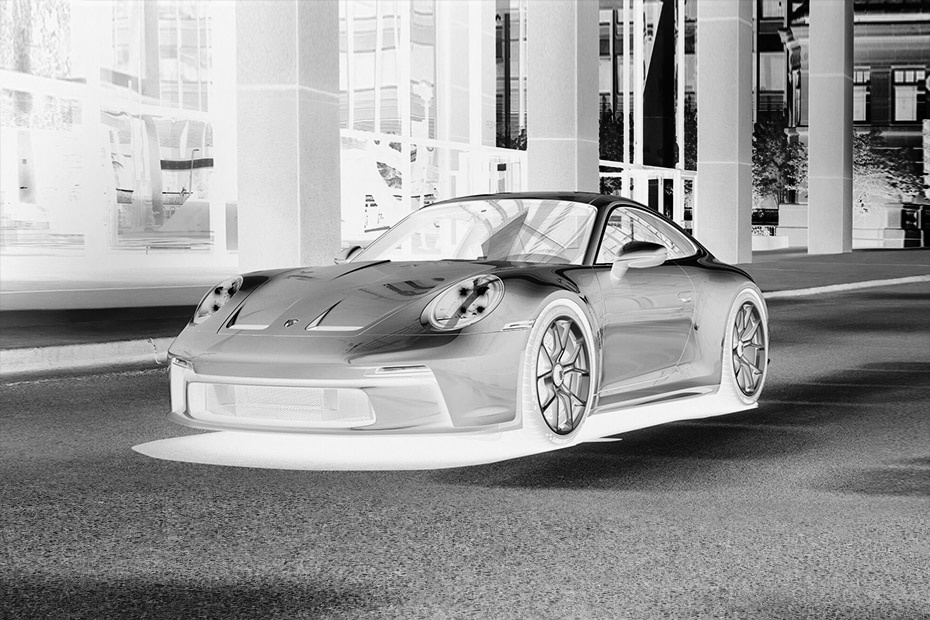
Invert the image
Now we need to invert the image. When I am telling invert, I mean white should become black and wise versa. It's as simple as simply subtracting 255 from each image pixel. Because, by default, images are 8bit and have a maximum of 256 tones:
inverted_img = 255 - grayscaleWhen we display the inverted image or save it on a disc, we receive the following picture:
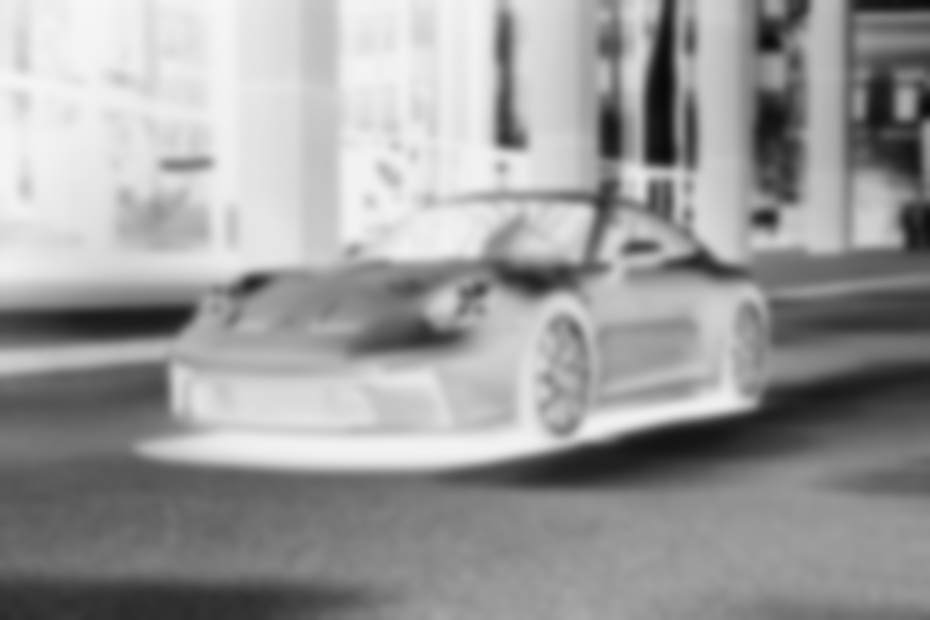
Blur the image
Now we need to blur the inverted image. Blurring is performed by applying a Gaussian filter to the inverted image. The most important thing here is the variance of the Gaussian function or sigma. As sigma increases, the picture becomes blurrier. Sigma controls the amount of dispersion and, therefore, the degree of blurring. A suitable value of sigma can be chosen by trial and error:
blur_img = cv2.GaussianBlur(inverted_img, ksize=(0, 0), sigmaX=5The results of the blurred image look following:
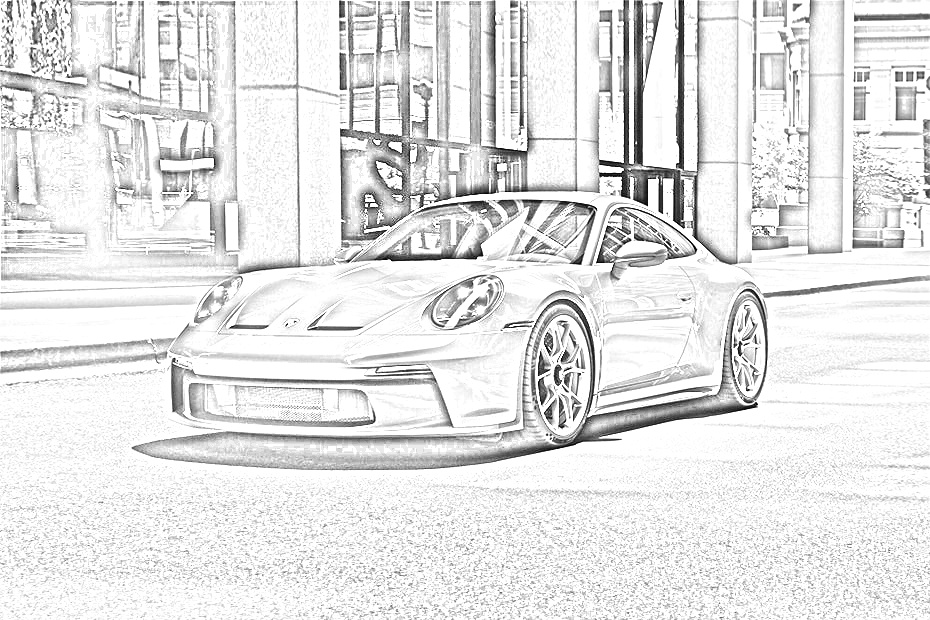
Dodge and Merge
Colour Dodge blending mode splits the bottom layer from the inverted top layer. This brightens the lower layer depending on the value of the upper layer. We have a blurry image that highlights the boldest edges.
def dodge(self, front: np.ndarray, back: np.ndarray) -> np.ndarray:
    """The formula comes from https://en.wikipedia.org/wiki/Blend_modes
    Args:
        front: (np.ndarray) - front image to be applied to dodge algorithm
        back: (np.ndarray) - back image to be applied to dodge algorithm

    Returns:
        image: (np.ndarray) - dodged image
    """
    result = back*255.0 / (255.0-front)
    result[result>255] = 255
    result[back==255] = 255
    return result.astype('uint8')

final_img = self.dodge(blur_img, grayscale)
And that's it! Here are the results:
Here is the complete pencil sketch code in the object:
class PencilSketch:
    """Apply pencil sketch effect to an image
    """
    def __init__(
        self,
        blur_simga: int = 5,
        ksize: typing.Tuple[int, int] = (0, 0),
        sharpen_value: int = None,
        kernel: np.ndarray = None,
        ) -> None:
        """
        Args:
            blur_simga: (int) - sigma ratio to apply for cv2.GaussianBlur
            ksize: (float) - ratio to apply for cv2.GaussianBlur
            sharpen_value: (int) - sharpen value to apply in predefined kernel array
            kernel: (np.ndarray) - custom kernel to apply in sharpen function
        """
        self.blur_simga = blur_simga
        self.ksize = ksize
        self.sharpen_value = sharpen_value
        self.kernel = np.array([[0, -1, 0], [-1, sharpen_value,-1], [0, -1, 0]]) if kernel == None else kernel

    def dodge(self, front: np.ndarray, back: np.ndarray) -> np.ndarray:
        """The formula comes from https://en.wikipedia.org/wiki/Blend_modes
        Args:
            front: (np.ndarray) - front image to be applied to dodge algorithm
            back: (np.ndarray) - back image to be applied to dodge algorithm

        Returns:
            image: (np.ndarray) - dodged image
        """
        result = back*255.0 / (255.0-front)
        result[result>255] = 255
        result[back==255] = 255
        return result.astype('uint8')

    def sharpen(self, image: np.ndarray) -> np.ndarray:
        """Sharpen image by defined kernel size
        Args:
            image: (np.ndarray) - image to be sharpened

        Returns:
            image: (np.ndarray) - sharpened image
        """
        if self.sharpen_value is not None and isinstance(self.sharpen_value, int):
            inverted = 255 - image
            return 255 - cv2.filter2D(src=inverted, ddepth=-1, kernel=self.kernel)

        return image

    def __call__(self, frame: np.ndarray) -> np.ndarray:
        """Main function to do pencil sketch
        Args:
            frame: (np.ndarray) - frame to excecute pencil sketch on

        Returns:
            frame: (np.ndarray) - processed frame that is pencil sketch type
        """
        grayscale = np.array(np.dot(frame[..., :3], [0.299, 0.587, 0.114]), dtype=np.uint8)
        grayscale = np.stack((grayscale,) * 3, axis=-1) # convert 1 channel grayscale image to 3 channels grayscale

        inverted_img = 255 - grayscale

        blur_img = cv2.GaussianBlur(inverted_img, ksize=self.ksize, sigmaX=self.blur_simga)

        final_img = self.dodge(blur_img, grayscale)

        sharpened_image = self.sharpen(final_img)

        return sharpened_image
It is possible to guess that we don't have much room to play with here, other than the blur_sigma parameter during blur. I added an extra function to sharpen the image to solve this problem. The results of the sharpening can be seen in this animated GIF:
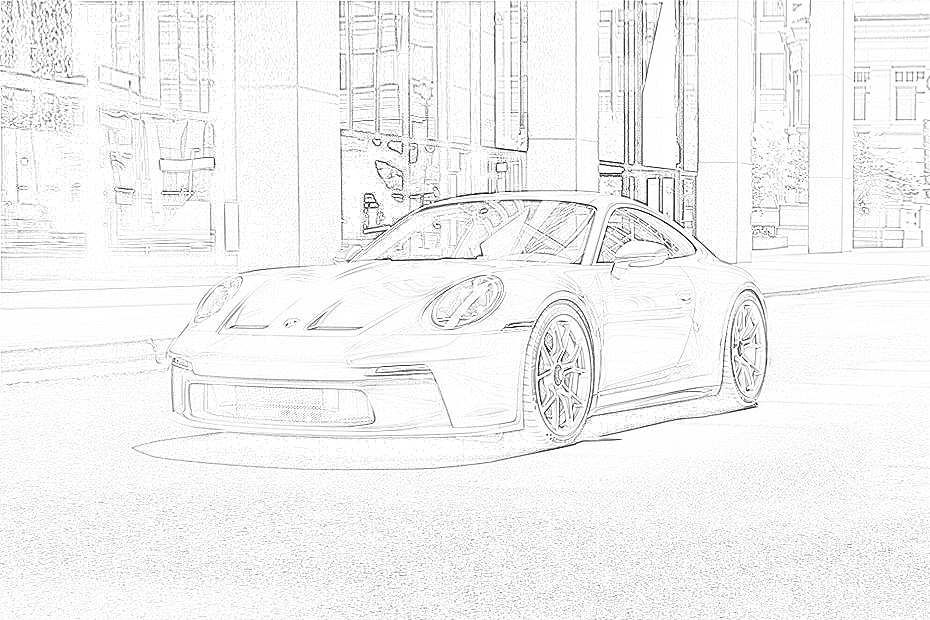
It is very similar to the blurring process, except that now, instead of creating a kernel to average each pixel intensity, we are making a kernel that will make the pixel intensity higher and, therefore, more visible to the human eye.
Here is a basic code on how to use the PencilSketch object for our porch image:
# main.py
from pencilSketch import PencilSketch
from engine import Engine

if __name__ == '__main__':
    pencilSketch = PencilSketch(blur_simga=5)
    selfieSegmentation = Engine(image_path='data/porche.jpg', show=True, custom_objects=[pencilSketch])
    selfieSegmentation.run()
Results of the above code, you can see the following:

Conclusion:
It was a pretty nice tutorial, that didn't require any deep python knowledge to achieve this amazing "pencil" sketch style from any image. While using my project files from GitHub and the Engine object you can easily apply this effect to any image, video, or real-time web camera stream.
In the next tutorial, I'll cover something even more exciting, I am thinking about face recognition because we already have face detection implemented. What is left - identify a person in that face.
Thanks for reading! As always, all the code given in this tutorial can be found on my GitHub page and is free to use!