Example images for this tutorial you can download from the same link as in the previous tutorial: HERE. In this part, we'll finish this tutorial series, we'll write a code that we could start script from the CMD line, and our script could process a batch of images in multiprocessing mode.
So for this tutorial part, we'll need to import two more libraries: "import sys" and "from multiprocessing import Process".
In this tutorial part, we edited only if __name__ == "__main__": code:
if __name__ == "__main__":
    start_time = time.time()

    RGB, TIFF = ReadPhotos(sys.argv[1], sys.argv[2])

    try:
        OneBatch = int(sys.argv[3])
    except IndexError:
        OneBatch = 3
    procs = []
    Batches = min(len(RGB), len(TIFF)) // OneBatch
    if min(len(RGB), len(TIFF)) % OneBatch:
        Batches += 1
    for Batch in range(Batches):
        print("Batches",Batch)
        for number in range(OneBatch):
            CurrentNumber = number+Batch+OneBatch
            if CurrentNumber == min(len(RGB), len(TIFF)):
                break
            proc = Process(target=MainFunction, args=(RGB[CurrentNumber], TIFF[CurrentNumber], CurrentNumber))
            procs.append(proc)
            proc.start()
        for proc in procs:
            proc.join()

    print("Time took:", time.time() - start_time)
    print("Finished")
Here, above, with sys.argv[*] argument, we are reading additional arguments which we give to our script from the CMD line. Then we are calculating how many batches we will iterate to process all images. OneBatch tells how many processes we would like to start for our image processing. One process is equal to one image. So when trying this example by yourself, don't try with a too high number; your computer may hang.
Simply in a for loop, we are iterating all images with our __main__ function, it's quite simple.
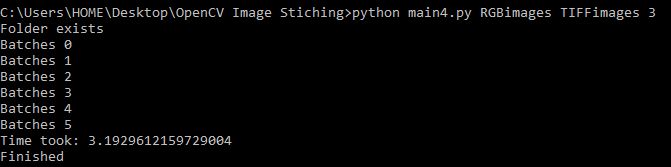
Let's test performance; let's start with 3 processes from the cmd line: python main4.py RGBimages TIFFimages 3. As shown below:
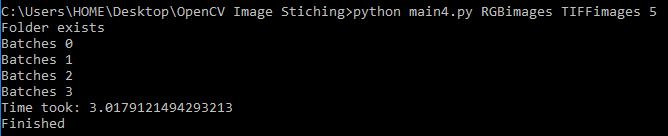
Let's test performance with 5 processes: python main4.py RGBimages TIFFimages 5:
Let's test performance with 10 processes: python main4.py RGBimages TIFFimages 10:

From the above examples, you can see that if we use more processes faster, we get the job done, but keep in mind that I am resizing images 10 times. In real-life use, you wouldn't change the image size. This is the reason why I get the job finished so fast.
Here is the full tutorial code:
import cv2
import numpy as np
import time
import os
import sys
from multiprocessing import Process

resizer = 1
OUTPUT = 'OUTPUT'

def ReadPhotos(Folder1, Folder2):
    try:
        os.mkdir(OUTPUT)
    except FileExistsError:
        print("Folder exists")
    JPEGlist = []
    TIFFlist = []
    if Folder1.endswith("jpeg") and Folder2.endswith("tiff") or Folder1.endswith("tiff") and Folder2.endswith("jpeg"):
        if Folder1.endswith("jpeg"):
            JPEGlist.append(Folder1)
            if Folder2.endswith(".tiff"):
                TIFFlist.append(Folder2)
        if Folder1.endswith("tiff"):
            JPEGlist.append(Folder2)
            if Folder2.endswith(".jpeg"):
                TIFFlist.append(Folder1)
    else:
        for files in os.listdir(Folder1):
            if files.endswith(".jpeg"):
                JPEGlist.append(Folder1+"/"+files)
            if files.endswith(".tiff"):
                TIFFlist.append(Folder2+"/"+files)
        for files in os.listdir(Folder2):
            if files.endswith(".jpeg"):
                JPEGlist.append(Folder2+"/"+files)
            if files.endswith(".tiff"):
                TIFFlist.append(Folder2+"/"+files)
    return JPEGlist, TIFFlist


def MainFunction(JPEGimage, TIFFimage, number=''):
    img_ = cv2.imread(JPEGimage)
    img_ = cv2.resize(img_, (0,0), fx=resizer, fy=resizer)
    img1 = cv2.cvtColor(img_,cv2.COLOR_BGR2GRAY)

    img = cv2.imread(TIFFimage)
    img = cv2.resize(img, (0,0), fx=resizer, fy=resizer)
    img2 = cv2.cvtColor(img,cv2.COLOR_BGR2GRAY)

    sift = cv2.xfeatures2d.SIFT_create()
    # find the key points and descriptors with SIFT
    kp1, des1 = sift.detectAndCompute(img1,None)
    kp2, des2 = sift.detectAndCompute(img2,None)
    #cv2.imshow('original_image_left_keypoints',cv2.drawKeypoints(img_,kp1,None))

    match = cv2.BFMatcher()
    matches = match.knnMatch(des1,des2,k=2)

    good = []
    for m,n in matches:
        if m.distance < 0.5*n.distance:
            good.append(m)

    if len(good) > 10:
        src_pts = np.float32([ kp1[m.queryIdx].pt for m in good ]).reshape(-1,1,2)
        dst_pts = np.float32([ kp2[m.trainIdx].pt for m in good ]).reshape(-1,1,2)

        M, mask = cv2.findHomography(src_pts, dst_pts, cv2.RANSAC, 5.0)

    '''
    draw_params = dict(matchColor = (0,255,0), # draw matches in green color
                       singlePointColor = None,
                       flags = 2)

    img3 = cv2.drawMatches(img_,kp1,img,kp2,good,None,**draw_params)
    cv2.imshow("original_image_drawMatches.jpg", img3)
    '''
    warped_image = cv2.warpPerspective(img_,M,(img.shape[1], img.shape[0]))

    RGBA_image = cv2.cvtColor(warped_image, cv2.COLOR_RGB2RGBA)
    RGBA_image[:,:,3] = img2
    cv2.imwrite(OUTPUT+"/_"+str(number)+".png",RGBA_image)


if __name__ == "__main__":
    start_time = time.time()

    RGB, TIFF = ReadPhotos(sys.argv[1], sys.argv[2])

    try:
        OneBatch = int(sys.argv[3])
    except IndexError:
        OneBatch = 3
    procs = []
    Batches = min(len(RGB), len(TIFF)) // OneBatch
    if min(len(RGB), len(TIFF)) % OneBatch:
        Batches += 1
    for Batch in range(Batches):
        print("Batches",Batch)
        for number in range(OneBatch):
            CurrentNumber = number+Batch+OneBatch
            if CurrentNumber == min(len(RGB), len(TIFF)):
                break
            proc = Process(target=MainFunction, args=(RGB[CurrentNumber], TIFF[CurrentNumber], CurrentNumber))
            procs.append(proc)
            proc.start()
        for proc in procs:
            proc.join()

    print("Time took:", time.time() - start_time)
    print("Finished")
Conclusion:
So in these 3 last tutorials, I wrote a task that I had to do for my job application. But I didn't take that job. If you are new to python, you can learn a lot from this task, such as working with OpenCV, multiprocessing, reading images from a folder, and much more. This task was beneficial to learn something new.