Keras implementation of YOLOv3 for custom detection:
Continuing from my previous tutorial, where I showed you how to prepare custom data for YOLO v3 object detection training, in this tutorial, finally, I will show you how to train that model.
First of all, I must mention that this code used in this tutorial originally is not mine. I was inspired by qqwweee/keras-yolo3. He wrote this code to train the custom YOLOv3 Keras model.
To make his code more efficient, I made few modifications to it:
1. Originally used PIL library to load an image for detection, I replaced it with OpenCV;
2. Originally used external font for drawing text on detected images - replaced with OpenCV;
3. Wrote my own detection scripts.
Quick Start:
1. Copy my GitHub repository. Must do these steps before;
2. Download YOLOv3 weights from the YOLO website, or use a wget command:
wget https://pjreddie.com/media/files/yolov3.weights
Copy downloaded weights file to model_data folder.
3. Convert the Darknet YOLO model to a Keras model:
python convert.py model_data/yolov3.cfg model_data/yolov3.weights model_data/yolo_weights.h5
4. Test YOLO v3 with image_detect.py or realtime_detect.py (modify used model and classes according to your needs)
Training guide:
There are 2 ways to train the custom model:
train_bottleneck.py- Choose this method if you train on CPU or train the model faster (lower accuracy model). Required a lot of RAM and HDD space;train.py- Choose this method if you train on GPU.
Modify before training:
If using train.py:
Line 19. Change annotation_path to your file (learned to generate them in the previous tutorial);
Line 20. Change log_dir, a directory where to save trained models and checkpoints;
Line 21. Change classes_path to your classes file (learned to generate them in the previous tutorial);
Line 22. anchors_path, don't change this if you don't know what you are doing;
Line 34. If training new model, leave it as it is "weights_path='model_data/yolo_weights.h5'", otherwise link your checkpoint;
Line 57. batch_size = 32, try to train with this. If you receive some memory error, decrease this number;
Line 76. batch_size = 8, same as in Line 57. I tried to train with gtx1080ti, received a memory error while using "batch_size = 32", was able to train with 8;
Lines 63,64 82, 83. Increase epochs count for better model accuracy.
If using train_bottleneck.py:
Line 19. Change annotation_path to your file (learned to generate them in the previous tutorial);
Line 20. Change log_dir, a directory where to save trained models and checkpoints;
Line 21. Change classes_path to your classes file (learned to generate them in the previous tutorial);
Line 22. anchors_path, don't change this if you don't know what you are doing;
Line 30. If training new model, leave it as it is "weights_path='model_data/yolo_weights.h5'", otherwise link your checkpoint;
Lines 72,73 86, 87, 105, 106. Increase epochs count for better model accuracy;
After finishing training in your logs file, a new "trained_weights_final.h5" model file should be created, which will be used for custom detection.
Test trained model:
So I wrote two scripts to test YOLO v3 object detection and its accuracy:
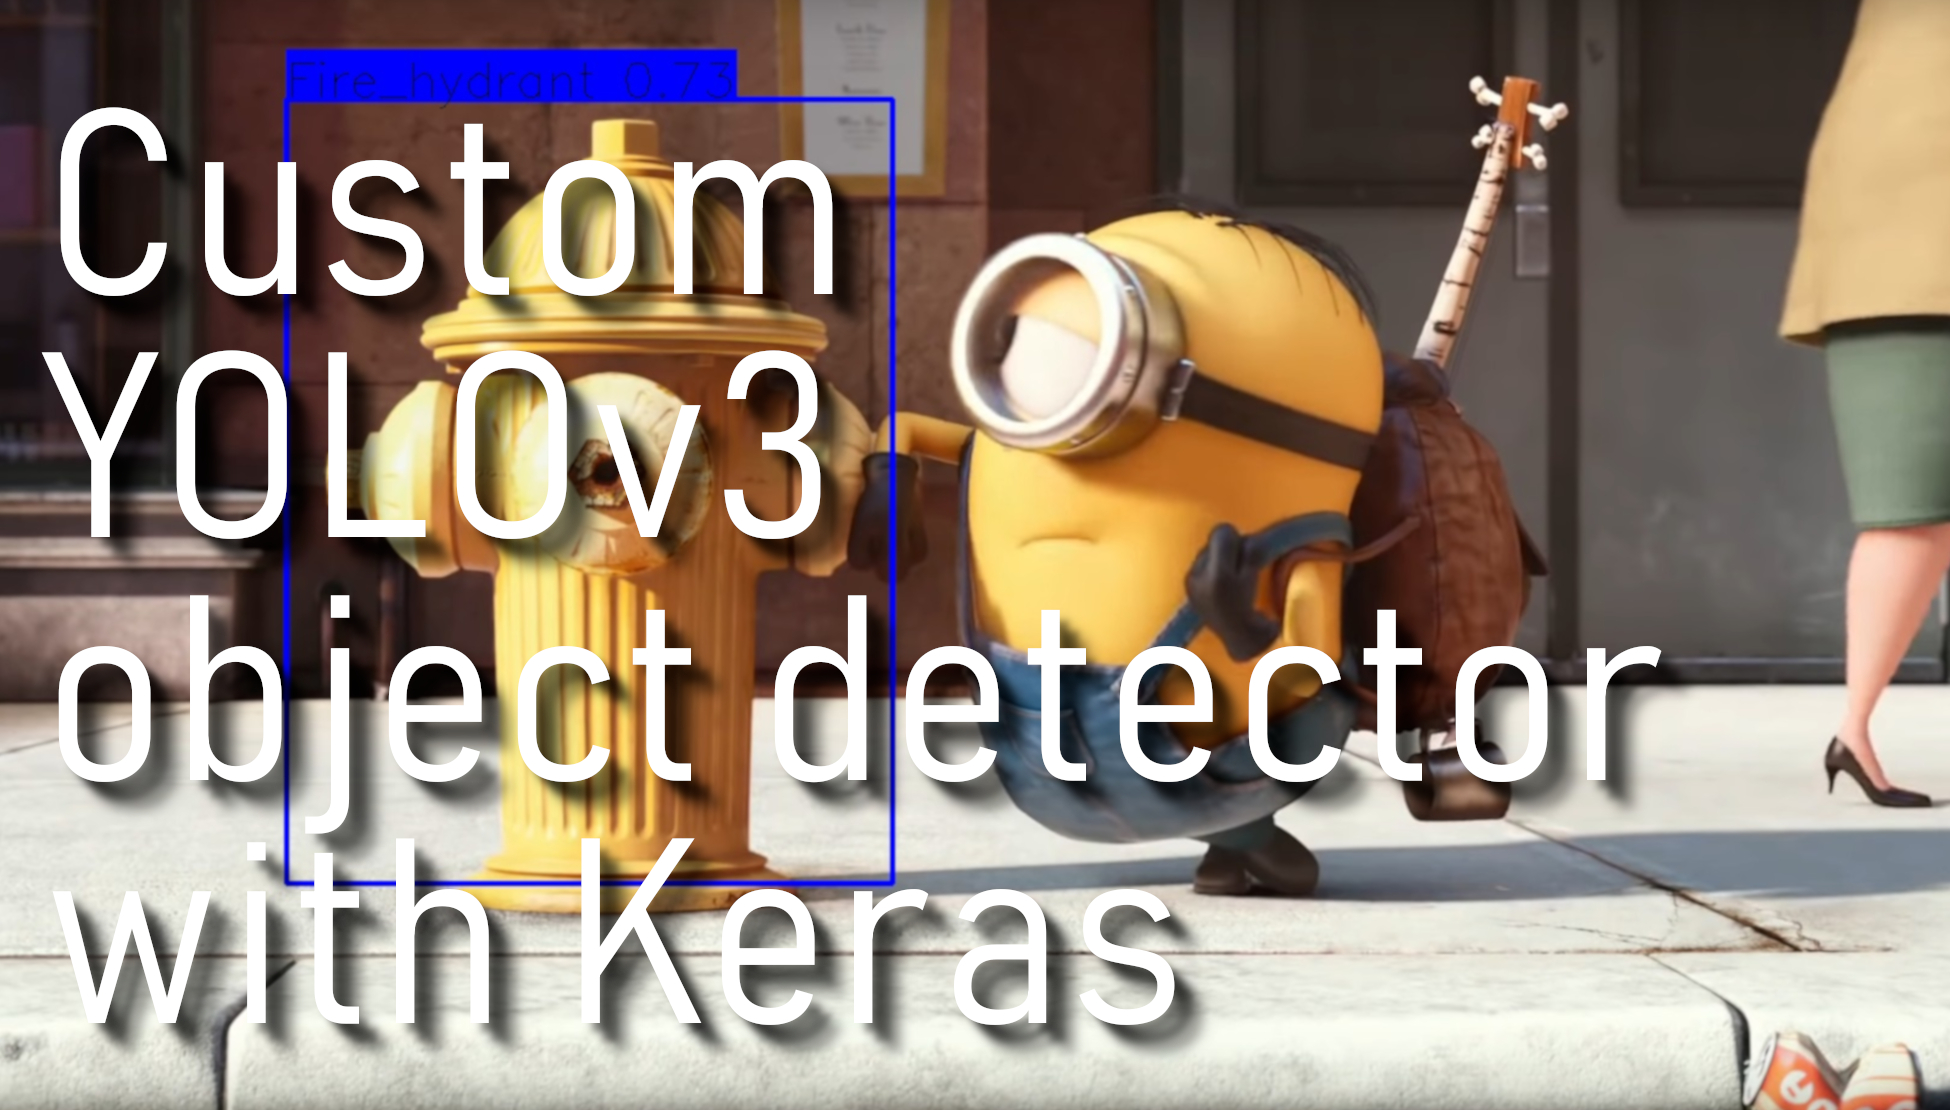
- The simpler one is to test it with
image_detect.py. Change "model_path" and "classes_path" to your user files. Then at the end of the file, you can find the "image = 'hydrant.jpg'" line; here, change your test image name. - The second method I used in
realtime_detect.pyis that I try to grab my computer screen and detect objects on it. If you were following me for a while, you should remember that I found a way to grab the screen faster using multiprocessing, so here I used the same method to check YOLO v3 performance. If you were watching this tutorial, you could see that with a 1080x1080 screen on a 1080ti GPU, I am receiving around ~14 FPS. And with 800x600, I am receiving around ~20 FPS. This is much better than using object detection API!
Conclusion:
We successfully trained a custom YOLO v3 object detection model on Keras. In the next tutorial, let's train this model to detect CS:GO enemies! We are receiving quite nice performance results, and for you guys, it should be much easier to train a new model than using object detection API; download my code from my GitHub page.