Welcome everyone to part 20 of the web development in Python with Django. First of all, I wasn't planning to make this tutorial at first, but I got a request to cover a topic on implementing account authentication with 3rd party pages. So, this will be a simple tutorial to explore social (Google) OAuth 2.0 authentication integration with Django.
First, what is OAuth? That's an open authorization service that allows websites or applications to share user information with other websites without being given a user's password. Users can sign in to multiple sites using the same account without creating other credentials. There are plenty of these OAuth service providers that finite list can be found on this official link. Most popular are Google, Facebook, Twitter, and GitHub. When we implement one of them, it's pretty simple and similar to adding more of them. I'll cover only the Google provider in this tutorial because this post would be too long to cover all of them.
In this tutorial, I'll continue working on my previous tutorial (SQLite to PostgreSQL), but there shouldn't be any problems if you create a Django project from scratch to try it out.
We begin by installing the django-allauth library: pip install django-allauth. I am adding this to my project requirements.txt file for future use.
Next, we need to modify our project settings.py file, and I am adding the following new lines to our existing settings:
# django_project/settings.py
SITE_ID = 1

INSTALLED_APPS = [
    ...
    'django.contrib.sites',
    'allauth',
    'allauth.account',
    'allauth.socialaccount',
    'allauth.socialaccount.providers.google',
]

SOCIALACCOUNT_LOGIN_ON_GET=True

AUTHENTICATION_BACKENDS = [
    ...
    'allauth.account.auth_backends.AuthenticationBackend'
    ]

SOCIALACCOUNT_PROVIDERS = {
    'google': {
        'SCOPE': [
            'profile',
            'email',
        ],
        'AUTH_PARAMS': {
            'access_type': 'online',
        }
    }
}
With line allauth.socialaccount.providers.google, we specify the OAuth provider since django-allauth supports many of them, as I mentioned.
We will also append django-allauth to an existing authentication backend for our application in the AUTHENTICATION_BACKEND configurations.
Finally, we enable email scope to receive users' email addresses after successful social login. Also, we need to add SITE_ID=1 and register our site on our Django admin page.
Although its recommended to handle login and logout redirect, because I am handling it differently on my project, I am not adding them, but if you're creating a project from scratch, you may need additional parameters here, such as:
LOGIN_REDIRECT_URL = '/'
LOGOUT_REDIRECT_URL = '/'
Great, now as your intuition can tell, we will add a button in our login template, so the user can choose whether type in his login details or log in by using Google. So I navigate to my login template in users/templates/users/login.html and add the following new lines to it:
<-- users/templates/users/login.html -->
{% load socialaccount %}
{% block content %}
    ...
    <button class="btn btn-outline-info">
        <a href="{% provider_login_url 'google'%}?next=/">
            <i class="fab fa-google"></i>
            Login with Google
        </a>
    </button>
    ...
{% endblock content %}
Here, it's a must to import {% load socialaccount %} at the beginning of the template. Then we added a google button for login with a bit of CSS to make it more attractive.
Now we need to navigate to the urls.py file of our project and include allauth URLs to existing ones. All OAuth operations will be performed under this route:
# django_website/settings.py
...
from django.urls import path, include
urlpatterns = [
...
path("", include("allauth.urls")), #most important
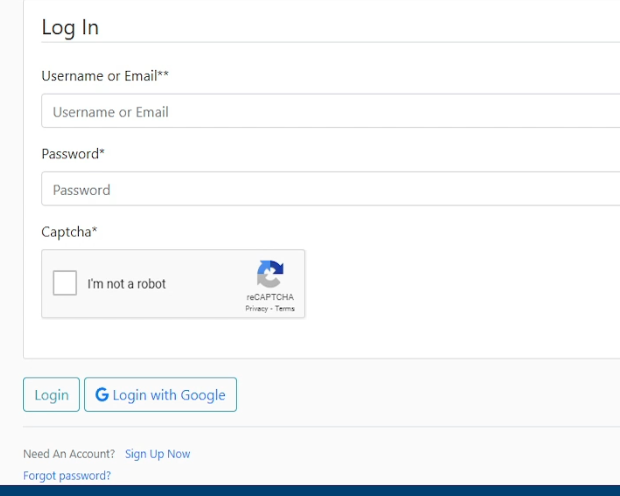
]The critical part of our project is done here. Now we need to configure Google APIs. This is how our login page looks now with this new google login button:
Configuring Google APIs:
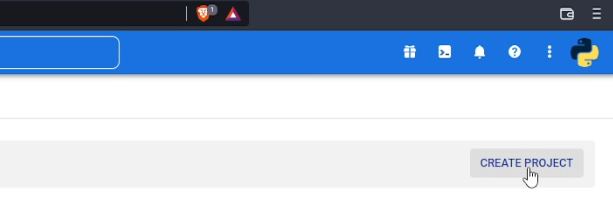
You'll need to set up an OAuth application via Google Developers Console to add a Google login to your app. We start by creating a new project:
 That we name it however we want; for instance, I name it
 django-project and click - create.
Now we click on the tab "OAuth consent screen" in the left-side navigation bar and click on "External" because it doesn't allow us to choose "Internal". And we click Create.
In a new tab, we need to type our App name (django-tutorial in my case), User support email, and developer contact information. But if you're creating this stuff for your deployed Django project, it would be better to fill all the fields correctly. Now we click "Save and Continue" several times, and we are done here.
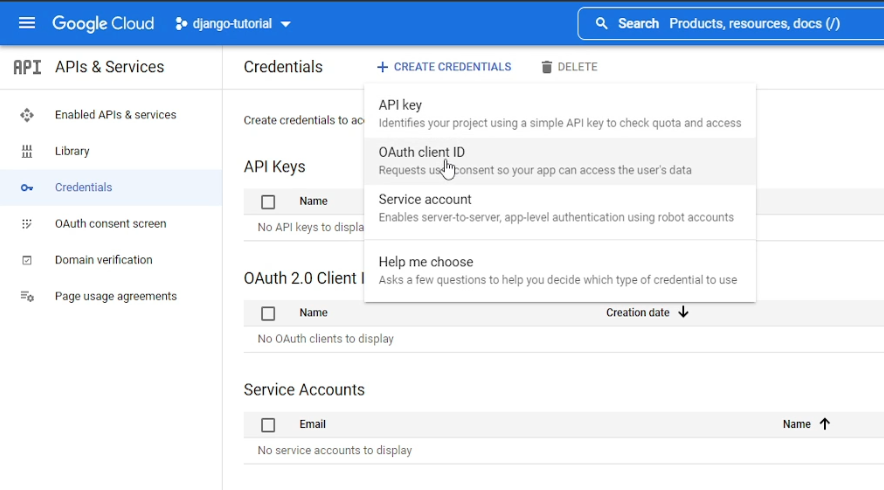
We created our project, so we need to create our OAuth client. To do so, we navigate to the "Credential" navigation tab and click on a button to "create credentials", and from the list options, we choose "OAuth client ID":
 In the next window, we choose "Web application", for which we give a "django-tutorial" name.
We add a URI with http://127.0.0.1:8000 localhost details in the Authorizer JavaScript origins tab. If you are doing this for your existing domain, it should be your domain name.
Also, we need to create an Authorized redirect URI, where we type http://127.0.0.1:8000/google/login/callback/ information.
After filling this page, we click create, and you should see a similar prompt:
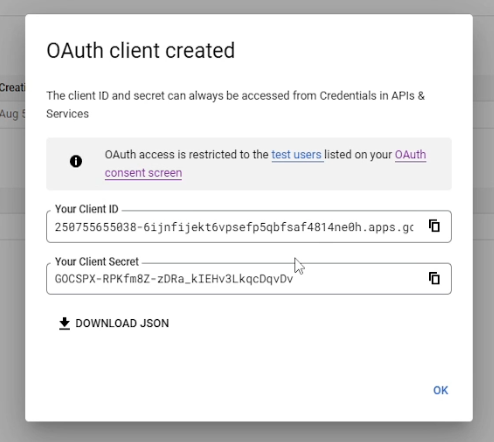
Copy and save "Your Client ID" and "Your Client Secret" codes temporarily; we'll need them later. Now we click OK, and our Google API should be prepared.
Create a social application on the Django admin page:
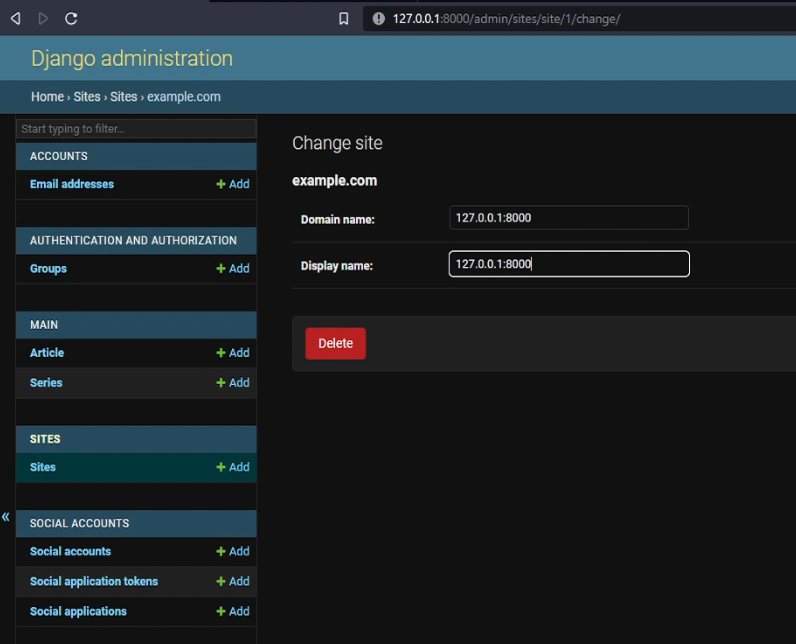
Open http://127.0.0.1:8000/admin/ page and log in to Django Admin. Under Sites, click Add and put 127.0.0.1:8000 as both the Domain name and Display (If now using any actual domain):
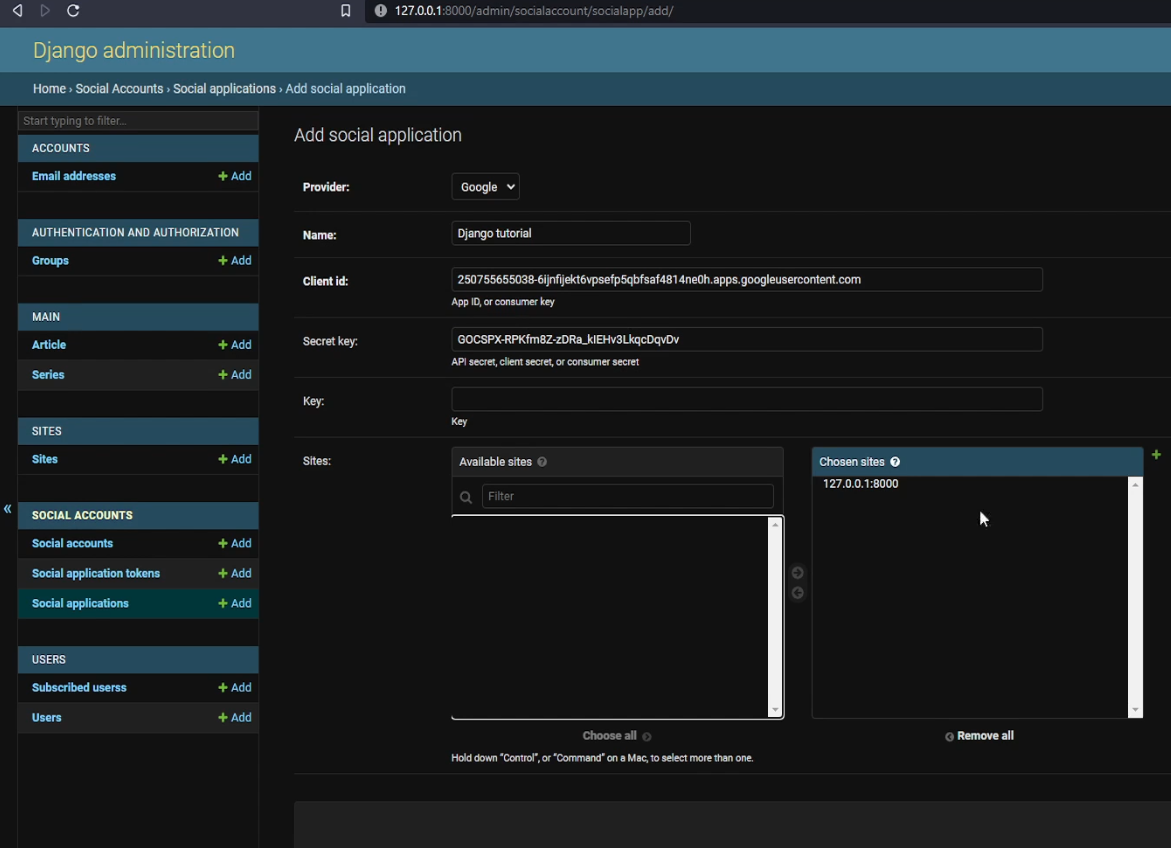
Then, under the "Social Applications", click Add and fill in the following details:
- Provider: Google;
- Name: django-tutorial;
- Client id: <The client ID you created before>;
- Secret key: <The Secret key you created before>;
- Sites: 127.0.0.1:8000.
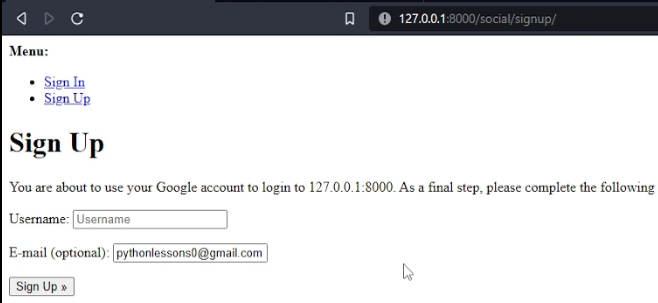
Since we are currently logged in as a superuser, log out and log in again using our Google account.
If you get an error:"SocialApp matching query does not exist at http://127.0.0.1:8000/google/login/", it means that the ID of the site you created in the Django admin is not the same as the one in settings.py. Consider playing around with the SITE_ID value. Let's give it a go, and we should see something similar to the following:

After signing in with Google, we can check the user profile information. If we log in to our admin user, in http://127.0.0.1:8000/admin/socialaccount/socialaccount/, we can check the user information we received from the social page. Sadly, Google provides little information about its users. Your app needs to be verified to get more user-specific information from Google.
Now let's try to log in with a Google account where the specified email has an associated email address in the database. This gives us the following error:
We are unsure what this template shows us, but we want to create a workaround for this problem. To do so, we need to create a redirect function for this specific URL:
# django_project/users/urls.py
from django.urls import path
from . import views

urlpatterns = [
    ...
    path('social/signup/', views.signup_redirect, name='signup_redirect'),
]
The above code will link us to the code below, where we'll prompt a message for a user and redirect the user back to the homepage:
# django_project/users/views.py
...
def signup_redirect(request):
    messages.error(request, "Something wrong here, it may be that you already have account!")
    return redirect("homepage")
Let's try logging in with the same existing email account. We should receive similar output:
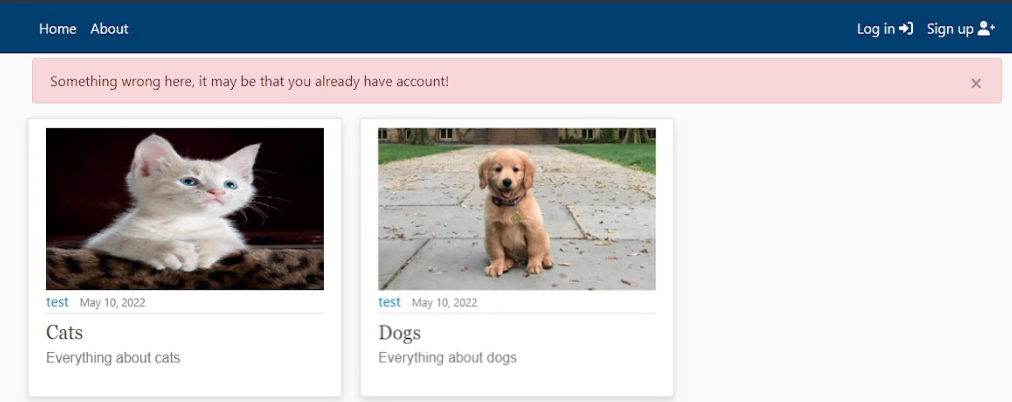
Everything works as expected! That's nice!
Conclusion:
While this particular tutorial only tests the OAuth 2.0 authentication for Google, you can also integrate other OAuth services similarly using the same django-allauth package. Refer to their list of providers for more information.
Overall, I am glad I managed to figure out how to implement social authentication in Django. It's much easier than I thought it would be, and I hope this will be useful for future projects for you or me.
See you in my next tutorial, final tutorial files you can download from my GitHub page.