Welcome everyone to part 9 of the web development in Python with Django. In this part, we will continue working on our user handling; we'll bring some dynamics to the page and some ability for users to log in and log out on our page.
At the end of the previous tutorial, I mentioned that we had some issues logging in and logging out. We had to do that by accessing the admin panel; that's very bad. Although our navigation bar was not showing anything about our user status, let's begin with that.
Dynamic navigation bar:
First, let's open our "django_project/main/templates/main/includes/navbar.html" template. Right now, we are always showing only the "Log in" and "Sign up" buttons, no matter what. But instead, we can do a check to see whether the user is authenticated. If they are, we should show a logout button and maybe a profile button, but we'll introduce it in another tutorial. Otherwise, we display login and register buttons.
So, instead of this simple stuff:
<!-- django_project/main/templates/main/includes/navbar.html -->
<a class="nav-item nav-link" href="/">
    Log in <i class="fas fa-sign-in-alt"></i>
</a>
<a class="nav-item nav-link" href="/">
    Sign up <i class="fas fa-user-plus"></i>
</a>
We improve it to the following:
<!-- django_project/main/templates/main/includes/navbar.html -->
{% if user.is_authenticated %}
    <a class="nav-item nav-link" href="{% url 'logout' %}">
        Log out <i class="fas fa-sign-out-alt"></i>
    </a>
{% else %}
    <a class="nav-item nav-link" href="{% url 'login' %}">
        Log in <i class="fas fa-sign-in-alt"></i>
    </a>
    <a class="nav-item nav-link" href="{% url 'register' %}">
        Sign up <i class="fas fa-user-plus"></i>
    </a>
{% endif %}
As we can see, it's pretty simple to check whether the user is authenticated or not. Although instead of using links to the homepage, now we will use login, logout, and register URLs. At this point, our webpage will give us an error because login and logout links don't exist, so let's create them!
Login and Logout URLs and templates:
If we want to do this quickly, we don't need to design anything for these functions. Django already has a built-in login and logout functions!
Let's head into our "django_project/main/urls.py" and add these two additional URL lines with related imports:
# django_project/main/urls.py
from django.urls import path
from django.contrib.auth import views as auth_views

urlpatterns = [
    path("register", views.register, name="register"),
    path('login', auth_views.LoginView.as_view(template_name='users/login.html'), name='login'),
    path('logout', auth_views.LogoutView.as_view(template_name='users/logout.html'), name='logout'),
]
At this point, we need to create HTML templates for these functions. Let's start with the logout template because it's damn easy and quick. let's navigate to "django_project/users/templates/users/" and create "logout.html" template with the following code inside:
<!-- django_project/users/templates/users/logout.html -->
{% extends "main/header.html" %}
{% block content %}
    <h2>You have been logged out</h2>
    <div class="border-top pt-3"  style="min-height:65vh;">
        <small class="text-muted">
            <a href="{% url 'login' %}">Log In Again</a>
        </small>
    </div>
{% endblock content %}
This template is as simple as notifying us that we were logged out and giving us a link to the login URL; it doesn't need anything else here.
Next, let's create the login template. Same as before, let's head to "django_project/users/templates/users" and create a "login.html" template:
<!-- django_project/users/templates/users/login.html -->
{% extends "main/header.html" %}
{% load crispy_forms_tags %}
{% block content %}
    <div class="content-section">
        <form method="POST">
            {% csrf_token %}
            <fieldset class="form-group">
                <legend class="border-bottom mb-4">Log In</legend>
                    {{ form|crispy }}
                </div>
            </fieldset>
            <div class="form-group">
                <button class="btn btn-outline-info" type="submit">Login</button>
            </div>
        </form>
        <div class="border-top pt-3">
            <small class="text-muted">
                Need An Account? <a class="ml-2" href="{% url 'register' %}">Sign Up Now</a>
            </small><br>
            <small class="text-muted">
                <a href="/">Forgot password?</a>
            </small>
        </div>
    </div>
{% endblock content %}
This template is way more complex, and we'll need to use a form with username and password fields. We'll use this to receive the POST requests, so we must use csrf_token. And to make it look beautiful, we are using crispy forms here. Also, in the end, we are adding a few more additional lines for users who don't have a registered account yet or have forgotten it. But for now, I'll redirect them back to the homepage - we'll come back to this in another tutorial.
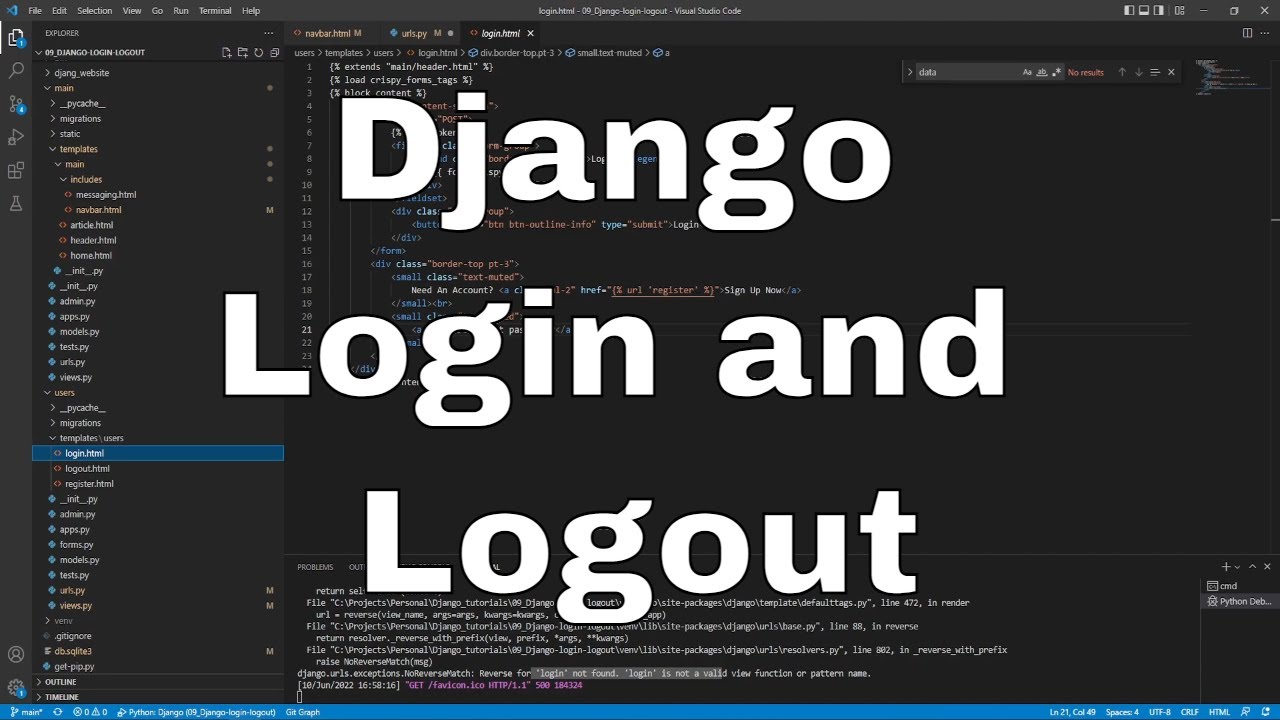
At this point, our basic login and logout functionality should already work. Let's try to login into our test user:
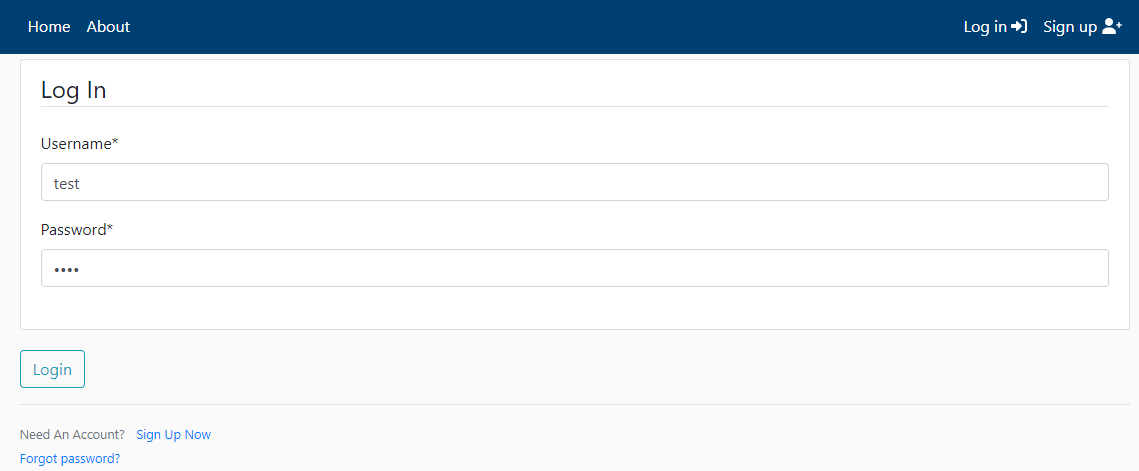
Our login template looks beautiful, let's see what happens if we press login:
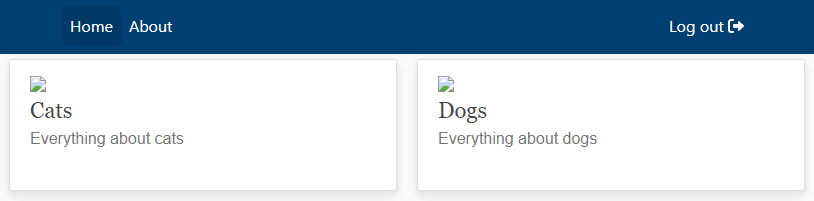 That's amazing; everything works like a charm! We can even see that our navigation bar is dynamic. If we would press the logout button, this also lets us out. For rapid development, that's enough, but what about the messaging system we created in the last tutorial? Or suppose we would like to use logins for either username or email or improve authentication with reCAPTCHA. In that case, we can't get these functionalities from these built-in functions, so let's create our custom view functions for these future purposes.
Creating custom view functions:
First, let's modify our users "urls.py" script to use our custom functions instead of built-in Django functions. Change it to the following:
# django_project/main/urls.py
from django.urls import path
from . import views

urlpatterns = [
    path("register", views.register, name="register"),
    path('login', views.custom_login, name='login'),
    path('logout', views.custom_logout, name='logout'),
]
So, this means we will use "custom_login" and "custom_logout" functions from our views files. Remember that Django has a built-in "logout" function, so if you make a function with the same name, you may face some issues to notice that. The same applies to the login function; because of this reason, I am changing names to custom.
I'll begin with the logout function, which requires only five lines of code:
# django_project/users/views.py
from django.contrib.auth import logout
from django.contrib.auth.decorators import login_required

...

@login_required
def custom_logout(request):
    logout(request)
    messages.info(request, "Logged out successfully!")
    return redirect("homepage")
Here to handle the logout functionality, we need to import the "logout" built-in Django function and "login_required" decorator. We need this decorator to make sure that users who are trying to log out are authenticated or, in simple terms - logged in. After that, we call the built-in Django logout function that does all the magic, and the last thing we do - we notify the user that he was logged out; that's it.
Great, we completed our "custom_logout" function. Now, let's head to "custom_login". First, we want to check if the everything works apart from the login, so we create a basic backbone function to render us our "login" template:
# django_project/users/views.py
from django.contrib.auth.forms import AuthenticationForm

...

def custom_login(request):
    if request.user.is_authenticated:
        return redirect('homepage')

    form = AuthenticationForm()

    return render(
        request=request,
        template_name="users/login.html",
        context={'form': form}
        )
So, to make a logout action, it was necessary to be authenticated. We do the opposite now; otherwise, we redirect the user to the homepage. Next, we use the built-in Django "AuthenticationForm" to ask the user for a Username and Password. Okay, now if we go to http://127.0.0.1:8000/login, we can see the same login page as before. Everything is fantastic. Except that, just like our registration page, nothing will happen unless we handle the POST request, which is where the meat of this page will be; here is the complete "custom_login" code:
# django_project/users/views.py
def custom_login(request):
    if request.user.is_authenticated:
        return redirect('homepage')

    if request.method == 'POST':
        form = AuthenticationForm(request=request, data=request.POST)
        if form.is_valid():
            user = authenticate(
                username=form.cleaned_data['username'],
                password=form.cleaned_data['password'],
            )
            if user is not None:
                login(request, user)
                messages.success(request, f"Hello <b>{user.username}</b>! You have been logged in")
                return redirect('homepage')

        else:
            for error in list(form.errors.values()):
                messages.error(request, error)

    form = AuthenticationForm()

    return render(
        request=request,
        template_name="users/login.html",
        context={'form': form}
        )
Same as in all places where we request some input from the user, we use the POST method; not an exception is the login function. We use the built-in Django Authentication form to receive the username and password from the user and check if it's valid. If the form is valid, we call the built-in Django authentication function that checks if such a user exists on our database, and if it does, we call the login function and redirect the user to the homepage. Otherwise, errors will be presented to the user with the help of messaging package. Now, let's try to log in:
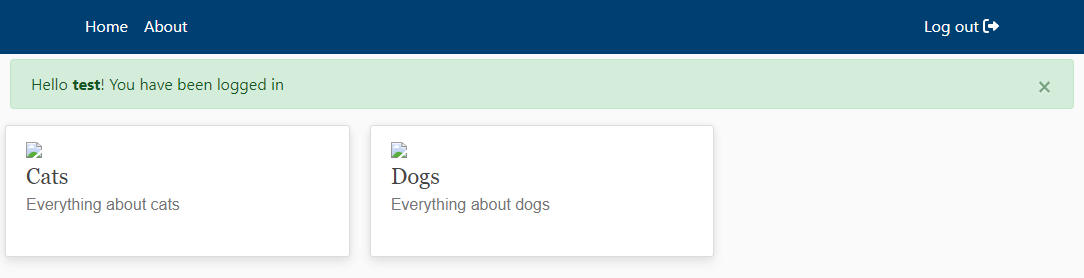
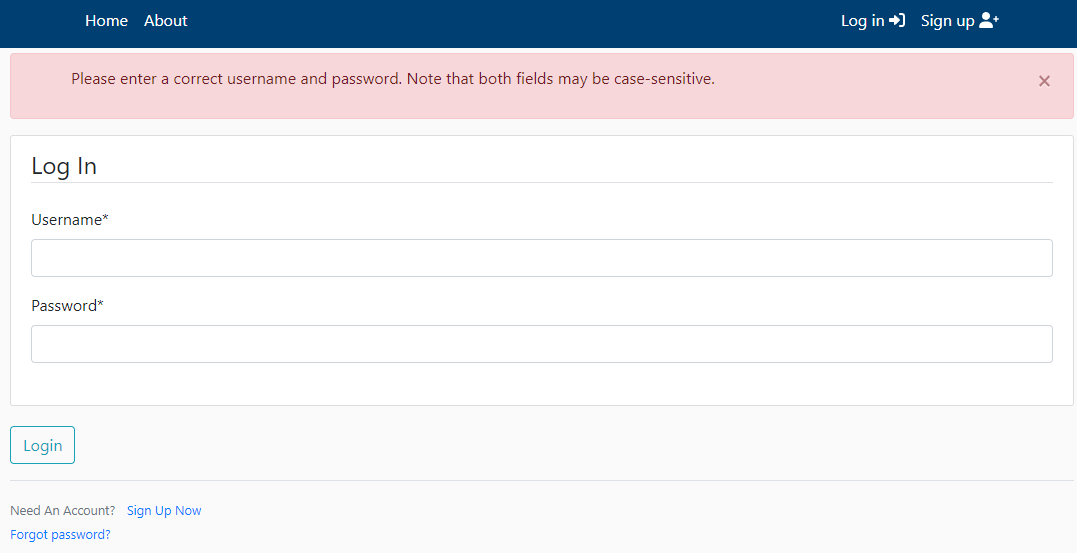
Everything worked like expected! And now, you can even see our message that we were logged in. You can try to do more other tests; here is one example with wrong input credentials:
Conclusion:
Because you may store users private and confidential information on your database, you must make it secure. So when building login, logout, and register functions, don't try to make these functions as quickly as possible. Try to find weak points in security and try to improve them. For this purpose, you need to understand what is happening in your code! These steps are among the most important when building a website with the Django framework.
Covering this tutorial, you saw that it's pretty easy to create an authentication system; even customizing it didn't take any time! You may notice that on some other pages, it's possible to log in either with a username or email. That's what I'll cover in the next tutorial!
See you in my next tutorial, final tutorial files you can download from my GitHub page.